CloudfloorDNS FAQs
Have Questions? Take a peek here to see if any of these answers will help.
Can’t find what you are looking for? Use the search in the upper right to search on your topic
How to backup up your DNS using Secondary DNS
With DDoS and other attacks against DNS on the rise, Backing up your Authoritative DNS provider can be a smart move. DNS is a critical component of your Internet Infrastructure and if you only have a single DNS provider your Digital Business can also go down with it. Secondary DNS allows you to backup your live DNS zones with a secondary DNS provider and adds another level of resiliency to help avoid any DNS outages. See the Secondary DNS service page for more detail on how CloudfloorDNS can backup your Primary DNS
We also have Technical How-To’s on setting up Secondary DNS with other popular DNS providers: Dyn, NS1, DNS Made Easy, GoDaddy Premium DNS
Here are the simple steps to setup Secondary DNS and have CloudfloorDNS backup your Zones:
1) Setup your DNS zone at your primary DNS provider
2) Enable AXFR zone transfers at your primary DNS provider
3) Add CloudfloorDNS AXFR IP’s at your Primary DNS Provider
3) Setup Secondary DNS account at CloudfloorDNS
4) At CloudfloorDNS you should add in the master IP of the AXFR server from your primary DNS
5) Zone should now be mirrored
6) Add in CFDNS Anycast DNS servers into the zonefile at your primary DNS
7) Force a zone replication to CloudfloorDNS
8) Add in CFDNS Anycast servers into your DNS Delegation at your registrar
Backup GoDaddy Premium DNS with Secondary DNS
Have your Authoritative DNS with GoDaddy Premium DNS? CloudfloorDNS can help you backup your Zones at GoDaddy quickly and easily with Secondary DNS
See our Secondary DNS How-To on enabling Secondary DNS at Cloudfloor to backup your DNS zones at GoDaddy
Backup Dyn DNS with Secondary DNS
Have your Authoritative DNS with Dynect? CloudfloorDNS can help you backup your Zones at Dyn quickly and easily with Secondary DNS
See our Secondary DNS How-To on enabling Secondary DNS at Cloudfloor to backup your DNS zones at Dyn
Backup NS1 DNS with Secondary DNS
Have your Authoritative DNS with NS1? CloudfloorDNS can help you backup your Zones at NS1 quickly and easily with Secondary DNS
See our Secondary DNS How-To on enabling Secondary DNS at Cloudfloor to backup your DNS zones at NS1
Adding permissions for another user to manage domains and DNS
Adding permissions for another user to manage domains and DNS
The CloudfloorDNS systems offers a convenient way to allow multiple users to have access to certain aspects of domain and DNS management. In order to add permissions, it’s best to set these permissions in a group. You can allow permissions based on an email address of a user in our system, and set specific permissions such as Edit DNS, Manage Domains or can only view.
IMPORTANT NOTE: Before you begin, there MUST be a user account in our system for the new user you with to grant permissions. You can create a new user account by visiting: https://Signup.CloudfloorDNS.com
QUICK METHOD TO PROVIDE ANOTHER USER ACCESS:
1) Click on the domain name in the list in the management panel that you wish to have another user help manage as shown below:

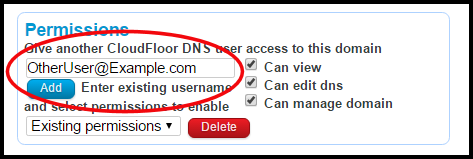
2) You’ll see the PERMISSIONS box as shown below. Select if the user can VIEW, EDIT DNS and/or MANAGE DOMAIN and enter in the new user email address (username on our system) – this merely provides access to view, edit or manage and you maintain ownership (admin) of the domain
GROUP METHOD TO PROVIDE ANOTHER USER ACCESS:
1) Create the user account by signing up at https://Signup.CloudfloorDNS.com (It’s Free) – Have the user signup for an account on our system. Once the user account is created, note the email address used, this is the username
2) Login into the master account where you wish to assign permissions to a domain or set of domains
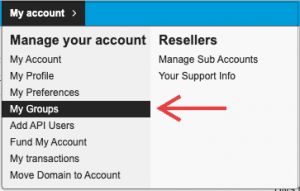
3) Click MY ACCOUNT tab and select MY GROUPS
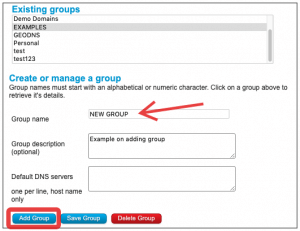
4) Scroll down to the CREATE OR MANAGE A GROUP. This is where you will add the new group. In this example we called it “NEW GROUP”. Type in the group name, and add a description. You can also set custom name servers for any domains in this group if you wish. Click ADD GROUP in the bottom left to create the group.
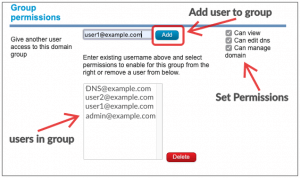
5) Select the group in the list that you created in step 4 and then down below in the GROUP PERMISSIONS, enter in the USERNAME (email address) and select permissions on the right side, then click ADD, this will add that user to the group of domains (You can use the Management panel, bottom left to ADD/REMOVE from group) and the FILTERS can filter the group – all done in the domain management panel
6) You now want to go back to the Domain/DNS management panel and select the domain(s) in the list that you wish to add to the group
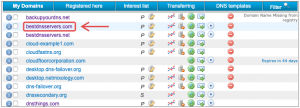
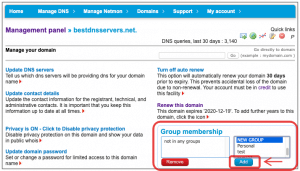
7) Select the Group and ADD DOMAIN to the group – that’s it. The domain name now inherits the users permission within the group
Keywords: ACL, access control, add user, add subuser, create subuser, Add permissions, remove permissions, edit ACL, Add user to domains, add user to DNS, Assign domain to another user
How to move a domain to another CloudfloorDNS account
How to move a domain to another CloudfloorDNS account
To move a domain between CloudfloorDNS accounts, go to the Management panel and click on the domain name you wish to move as shown in the screenshot below:

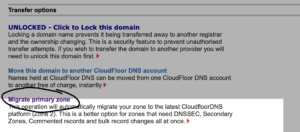
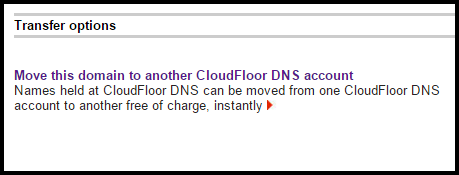
You’ll then be on the domain name info page. Scroll down to the bottom under TRANSFER OPTIONS: and you’ll see “Move this domain to another CloudfloorDNS account” as shown in the screenshot below
Enter a list of the domains you want to move, one per line, then the account holders email address you wish to move the domains to. Make sure this account is already setup. Once you press the button to confirm the move, the domains are immediately moved to the new account.
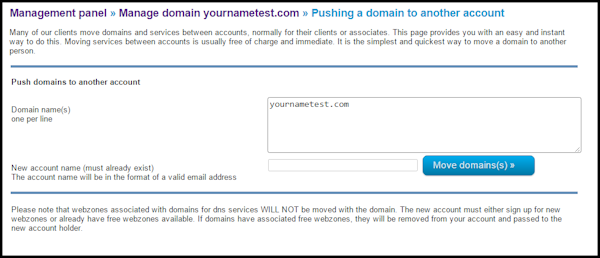
The DNS and domain configuration will be moved with the domain so no information will be lost. If the domain benefits from free services (such as a webzone), this will be removed from the senders account and placed on the receivers account. Other paid services are not moved, so it may be required that the receiver purchase additional webzones if they do not already have enough credit.
There is no charge to move domains between accounts.
keywords : domain, transfer, move, account
I have not used my dynamic account for a long time, now it does not work
I have not used my dynamic account for a long time, now it does not work
To preserve system resources, free dynamic domains that are not used after a long period of time may be automatically removed from the database. You must also maintain a valid email account in order to keep your free domain name. Please note that paid services will not expire unless the subscription ends.
What are your dns server names?
What are your dns server names?
We have a multitude of different DNS servers – it’s best to ask CloudfloorDNS support before guessing what name servers you should be using. Our Anycast DNS network is only provided to our Enterprise customers, the Unicast servers are listed below.
CloudfloorDNS Unicast DNS:
dns1.name-s.net
dns2.name-s.net
dns3.mtgsy.com
dns4.mtgsy.com
dns0.mtgsy.com
You should list yourself and the Technical contact as you are directly in charge of your zone. We also have .uk names for the first 2 name servers.
If your domain is in the .UK name space please use dns1.mtgsy.co.uk and dns2.mtgsy.co.uk instead of dns1.name-s.net and dns2.name-s.net.
ICANN Contact Validation & Domain Suspension
The Registrar Accreditation Agreement (RAA) with ICANN allows CloudfloorDNS to register top-level domain names (TLDs) to our customers. ICANN (The Internet Corporation for Assigned Names and Numbers) is the overseeing body that manages the Domain Name System (DNS) and since 2014 they have requiring registrars (domain name sellers) to verify registrant contact information.
The registrant is required to verify and validate their contact information via their email address using verification if the following occurs:
- A new domain is registered with unverified contact information
- A registrant updates their First Name, Middle Name, Last Name, Email address, or Organization with unverified information
- We are notified or have reason to believe that a domains contact info is invalid
If you have recently registered a domain, transferred a domain to us, or modified a domain Owner/Admin contact and have not received an email from us, you should:
- Check your SPAM, alternate folders and junk folders.
- Check that your registrant owner/admin email address is entered properly
- Make sure our email support@CloudfloorDNS.com is in your contacts and isn’t blocked
- You can always ask us to resend the verification, drop us a helpdesk ticket in our Support Center
Below is an example of the Verification Email that comes from CloudfloorDNS
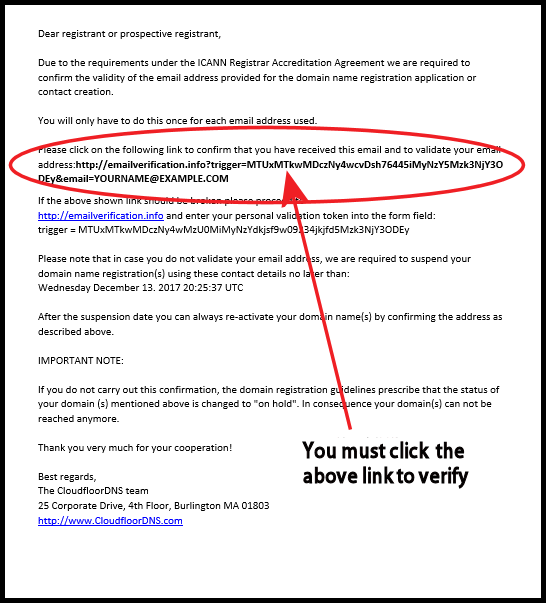
Once you click the link in the email you will be sent to the emailverification.info site and show the below button
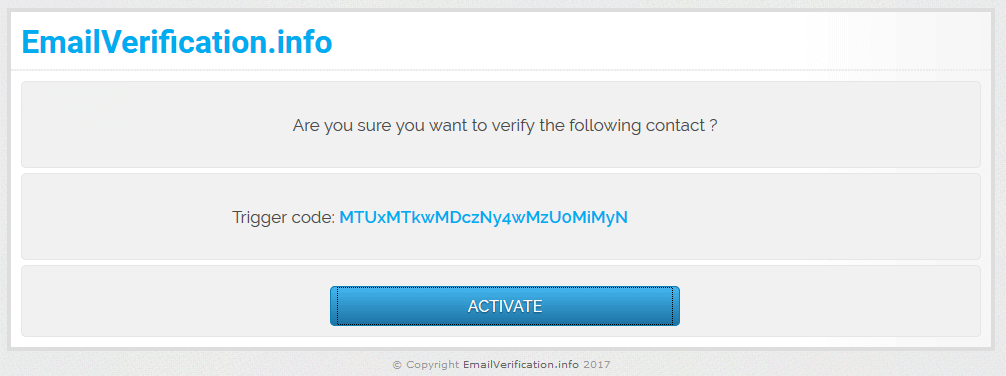
Once you properly verify your contact info you will see the below screen

Locking and Unlocking a Domain Name
Locking and Unlocking a Domain Name
We suggest that you lock your domain names at the registry level to keep them secure. Locked domain names cannot be transferred to another registrar and this prevents them from any unauthorized activity without your approval
In most cases you can leave the domain name locked unless you wish to transfer it – a locked domain name cannot be transferred – you must manually unlock it first
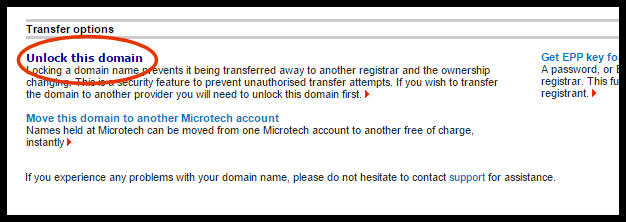
To unlock a domain in order to prepare to transfer a domain, click the domain name in the management panel. Once on the domain management page, click the option to ‘Unlock Domain’ as shown in the screenshot below. If this option shows LOCK DOMAIN, then your domain is already unlocked.
The domain name will be unlocked immediately. Please do not ask us to unlock domains for you as we cannot do this for security reasons.
If I transfer a domain to you, will it automatically be configured to use your DNS servers?
If I transfer a domain to you, will it automatically be configured to use your DNS servers?
No. A transfer simply moves the domain from one registrar to another, all details will remain the same until you update them via your management panel.
Changing your Domain Name Contact details
As of Dec 1, 2016 ICANN has updated the “rules” for updating Owner (Registrant) contact details and now requires an email approval from the current owner before the owner contact details can be changed. This can be from updating the name, address, phone or email address of the owner. ICANN considers any change of the owner contact name, organization or email address to be a trade, or transfer of the ownership of the domain between the two parties. That means that it is a “trade” in ICANN’s eyes even if the change doesn’t actually cause the domain to change hands.
This update adds an additional layer of security to your domain name registration and although may seem like more work, it’s to help protect your domain assets.
Here are the basic changes that are now implemented on generic top level TLD’s such as .COM, .NET, .ORG, and others
1. The current owner must accept the changes before actual information is updated and reflected in the WHOIS data.
2. When the Registrant information is changed the domain name has a 60 hold on it meaning that it cannot be transferred for the length of the hold period.
What are all these records types like MX, A, and CNAME anyway?
What are all these records types like MX, A, and CNAME anyway?
They identify different types of records in your DNS zone. For a pop-up description of the most common record types see below:
– A – They are used to translate human friendly domain names such as “www.microsoft.com” into IP-addresses such as 212.30.15.86 (machine friendly numbers) and map IP addresses directly to hostnames. When managing your DNS file using our web based management the A record wizard quickly adds/changes/removes A records for you.
– MX – MX-records identify mail server responsible for handling mail for your domain name.
When sending an e-mail to “user@xyz.com”, your mail server must first look up the MX-record for “xyz.com” to see which mail server actually handles mail for “xyz.com” (this could be “mail.xyz.com” – or someone else’s mail server like “mail.isp.com”). Then it looks up the A-record for the mail server to connect to its IP-address.
An MX-record has a “Preference” number indicating the order in which the mail server should be used (Only relevant when multiple MX-records are defined for the same domain name). Mail servers will attempt to deliver mail to the server with the lowest preference number first, and if unsuccessful continue with the next lowest and so on.
An MX-record identifies the name of a mail server server – not the IP-address. Because of this, it is important that an A-record for the referenced mail server exists (not necessarily on your server, but wherever it belongs), otherwise there may not be any way to find that mail server and communicate with it.
Do not point an MX record to a CNAME-record. Many e-mail servers don’t handle this. Add another A-record instead.
CNAME – CNAME records are domain name aliases. Often computers on the Internet have multiple functions such as web-server, ftp-server, chat-server etc.
To mask this, CNAME-records can be used to give a single computer multiple names (aliases).
For example computer “www.mycomputer.com” may be both a web-server and an ftp-server, so two CNAME-records are defined:
“www.mycomputer.com” = “xyz.com” and “ftp.mycomputer.com” = “xyz.com”.
Sometimes a single server computer hosts many different domain names such as web servers that host many sites. In this example many CNAME records may be defined such as “www.abc.com” = “www.xyz.com”. The most popular use the CNAME-record type is to provide access to a web-server using both the standard “www.domain.com” and “domain.com” (without the www).
This is usually done by creating an A-record for the short name (without www), and a CNAME-record for the www name pointing to the short name. CNAME-records can also be used when a computer or service needs to be renamed, to temporarily allow access through both the old and new name. A CNAME-record should always point to an A-record to avoid circular references.
There are lots of other less frequently used types. If you are interested in finding out more, we recommend you read RFC1035 at https://www.ietf.org/rfc.html
SOA – Name of primary DNS server – The domain name of the primary DNS server for the zone.
The zone should contain a matching NS-record.
Mailbox of responsible person
The email address (replace @ with a dot) of the person responsible for maintenance of the zone.
The standard for this is the “hostmaster” username – such as “hostmaster.microtech.co.gg” (= hostmaster@microtech.co.gg).
Serial number (see Zone Transfers)
Used by secondary DNS servers to check if the zone has changed.
If the serial number is higher than what the secondary server has, a zone transfer will be initiated.
This number is automatically increased when changes to the zone or its records are made.
Unless you have a specific reason for changing this numbers, it is best to let us manage it.
You should never decrease (lower) a serial number.
Refresh Interval (see Zone Transfers)
How often secondary DNS servers should check if changes are made to the zone.
Retry Interval (see Zone Transfers)
How often secondary DNS server should retry checking if changes are made – if the first refresh fails.
Expire Interval (see Zone Transfers)
How long the zone will be valid after a refresh.
Secondary servers will discard the zone if no refresh could be made within this interval.
Minimum (default) TTL
Used as the default TTL for new records created within the zone.
Also used by other DNS server to cache negative responses (such as record does not exist etc.).
NS Records – NS-records identify DNS servers responsible for your zone.
A zone should contain one NS-record for each of its own DNS servers (primary and secondaries).
This mostly is used for zone transfer purposes (notify). These NS-records have the same name as the zone in which they are located.
The most important function of the NS-record is delegation. Delegation means that part of a domain is delegated to other DNS servers. For example all “.com” sub-names (such as “microtech.com”) are delegated from the “com” zone (hosted by the “InterNic”). The “com” zone contains NS-records for all “.com” sub-names (a lot!).
You can also delegate sub-names of your own domain name (such as “subname.yourname.com”) to other DNS servers. You are in effect the “InterNic” for all sub-names of your own domain name
To delegate “subname.yourname.com”, create NS-records for “subname.yourname.com” in the “yourname.com” zone. These NS-records must point to the DNS server responsible for “subname.yourname.com” for example “ns1.subname.yourname.com” – or a DNS server somewhere else like “ns1.othername.net”.
An NS-record identifies the name of a DNS server – not the IP-address.
Because of this, it is important that an A-record for the referenced DNS server exists (not necessarily on your server, but wherever it belongs), otherwise there may not be any way to find that DNS server and communicate with it.
How will I know when my domain is due for renewal?
How will I know when my domain is due for renewal?
We will send a reminder to the email contact you provided, or the billing contact if it is not the same address at least 30 days before your domain is due to expire. It is your responsibility to ensure that the email address provided is correct. In order to keep prices low we can only issue invoices/reminders via email.
Do you charge if I want to transfer my domain away from you?
Do you charge if I want to transfer my domain away from you?
No. This is a common hidden charge made by some other cut price registrars. We don’t have any hidden charges.
I spelled my domain name wrong when I applied for it. Can I change it or have a refund?
I spelled my domain name wrong when I applied for it. Can I change it or have a refund?
No. All domain name applications are final. But, if you spelled it wrong, so can your visitors! It often pays to register several mispellings of your domain name to make sure people who make such mistakes can still reach your site.
How long will it take for my domain to start working?
How long will it take for my domain to start working?
Normally, within 24-72 hours. For domains in the Channel Islands namespace this will take longer.
Can I pay several years in advance?
Can I pay several years in advance?
You can renew your domain multiple times to extend the current expiration date up to 10 years in the future, or you can deposit funds into your account on our system and those funds will remain in your account for automatic renewals and can extend your domain each year automatically
What is your IPS tag?
What is your IPS tag?
At CloudfloorDNS our IPS TAG is ‘MICROTECH’ (without the quotes). This goes back to our early days when we were called Microtech Limited.
Please do not change the tag on your domain unless you have completed a transfer request on the web site. Failure to do this may result in your domain eventually becoming detagged.
Does the forwarding service support a catchall wildcard?
Does the forwarding service support a catchall wildcard?
Yes, wildcards in the format *@yourdomain.com are supported. If you are using these in conjunction with other forwards on the same domain name you must ensure the wildcard is added as the last forward.
How do I set up reverse DNS?
How do I set up reverse DNS?
You need to have a subnet allocated to you by your service provider. If you have an entire class C netblock, get your ISP (or ARIN) to delegate reverse DNS to our dns servers then add the relevant reverse zone for your subnet, e.g. 0.168.192.in-addr.arpa. If you have less than a class C you can still have reverse dns, but it is not quite so easy (for your isp anyway). You need to have your ISP CNAME the records to our servers. Most decent ISP’s will do this, but a few won’t. If you just need a single entry for a mail server for example, it may be easier to simply request your ISP add a reverse lookup for you to their dns. Reverse DNS is not required for most internet systems, but your may get a problem sending email directly to some mail servers such as AOL who use reverse lookups to try to help and prevent spam. The most common requirement for reverse dns seems to be to help with this particular situation. An alternative if you experience this problem would be to relay your emails out via your ISP or via a mail relay such as one of our email services. Example reverse zone file names 0.168.192.in-addr.arpa (class C) 192/29.86.179.213.in-addr.arpa (/192 network) 136/29.180.172.212.in-addr.arpa (/136 network)
What is the best way to transfer a live .COM or .NET domain?
What is the best way to transfer a live .COM or .NET domain?
We suggest you make sure your DNS is up and running here before you try to move your domain.
This means that either your own dns servers or ours are configured and ready to accept requests for your name.
Ask the current ISP or Registrar to change the name servers to CloudfloorDNS before you transfer it. Please note that some hosting providers will remove your DNS immediately they change the name servers.
This could leave your domain in limbo for a day or two if you don’t change the name servers first.
Following the procedures above, making sure the domain is older than 60 days, and making sure the domain is not Locked (Transfer Lock) before you try to transfer domains should make your transfers go smoothly. If you need further advice just contact us
How do I create a name server?
How do I create a name server?
If you wish to use name servers within one of your own domains with .com/net/org, you will probably need to register it first. This can be done via the support, utilities section of our web site. Things to note. You must have permanent static IP’s for mail servers, they cannot be registered on dynamic IP’s. Depending on the registry, the IP you register for the name server must not have been already registered under a different name. The domain name you are registering the name servers in must be held with us, else we won’t have permission to create your name server records for you. The domain must be unlocked. To unlock the domain, visit the management panel and click on the domain name. You can lock it again after you have created the name servers.
How do I take control of a domain someone else registered for me?
How do I take control of a domain someone else registered for me?
Firstly, you should make all attempts to contact the person who originally registered the domain for you. If you create your own free account on our site, they can “push” the domain into your account for you. This can be found under the MY ACCOUNT link on the Management panel
Load balancing with and without AUX value?
Load balancing with and without AUX value?
You can perform load balancing in several ways on the CloudfloorDNS servers using the ‘AUX’ record.
The AUX DNS value is most commonly used with MX records and is designed for resillience purposes since most people have more than one mail server. This AUX value enabled mail to be received at an alternate location if you main mail server fails for some reason and it acts as a priority or importance value. The AUX value will tell other servers which order mail should be tried in. The remote server will use the MX records with the lowest value first. The remote server would attempt to connect to the server with value of 10 first, then 20, then 30, etc.
Load Balancing
The AUX value also has another purpose on the CloudfloorDNS servers, and this is load balancing. If your zone file has more than one IP address for the same A record we will weight the reponses using the aux value. A low aux value makes an address record more likely to be listed first. The balancing algorithm causes servers with a lower aux to be selected more frequently than those with higher values, although all servers will still be listed first occasionally, as the algorithm is partially random. See the example below on how this is used in a zone file. You can see that there are four WWW records, all at different IP’s and 198.51.100.200 has the lowest AUX value of 10, so it will get the most hits.
CloudfloorDNS DNS Load Balancing
Records where aux is 0 (zero) will be listed first almost every time. Records where aux is 50,000 or greater will always be listed last. Here is an example of how hosts were distributed on a 100,000 query test against ten hosts with aux values 10-100. The number shown is the number of times that host was listed first:
aux 10 – 51,211 queries
aux 20 – 21,881 queries
aux 30 – 10.983 queries
aux 40 – 6,209 queries
aux 50 – 3,661 queries
aux 60 – 2,311 queries
aux 70 – 1,526 queries
aux 80 – 1,032 queries
aux 90 – 675 queries
aux 100 – 511 queries
Round Robin If your zone file contains more than one address record for the same A record name we will serve them up in a random order each time. Round robin is used only if all the address records found have an aux value of zero. If any of the records have an aux value that is non-zero, load balancing will be used instead. Note that we will also return multiple same-preference MX records in random order, to help equalize the load among same-preference MX hosts.
How to use TTL (Time to Live) settings
DNS Time to Live’s (or TTL’s)
Setting the TTL inappropriately for your domain can have significant side effects in terms of dns traffic and web site performance.
This document is intended to suggest reasonable TTL’s (time to live’s) and give some information on best practices for your domains.
Why is the TTL important?
The ‘time to live’ of a dns record specifies the amount of time other dns servers can cache your IP address before checking with us to see if it has changed again. DNS servers at users ISP’s generally provide a lookup service that is more local to the user, and hence generally faster to respond. The use of caching enables other users of the ISP that lookup the same record to retrieve the information directly from a very close source generally at a much greater speed. If there was no cache, every single time a web site URL was requested a dns query would need to be made to the servers that run dns for that domain. This can only take 20-50 milli seconds or so, but bear in mind a page may refer to a url lots of times on a page resulting in multiple dns lookups. On many sites as many as 20-30 times a page. Having a local cache prevents repeat lookups for information that is unlikely to have changed. If your TTL is set at 1 hour, the local ISP can cache that record locally and provide the information to other users from it’s local cache. Users PC’s also cache the information right on their own desktop meaning even faster access after that initial lookup.
The downside of a long ttl
The downside of having a TTL set at 24-48 hours as most larger ISP’s and web hosts do is that if you do have to make a change to your domains dns it can take up to the TTL to fully propagate around the world. This means that with your TTL set at 24 hours, some ISP’s could still be serving the old information 23 or so hours later. This is worst case, but you can see that it would be important to have both the old and new IP addresses both answering queries for the domain for some time to prevent some users being unable to access them.
The benefit’s or a short TTL
If your TTL is short it should be cached for a shorter duration by other internet systems. This means that should an IP address change as a result of a server move or network re-configuration, users pick up on that change and things start working again more quickly.
Finding a balance
The answer is to find a reasonable balance between lower TTL in case you need to make a change to your dns, and less dns traffic/better performance experienced with longer TTL’s. At first thought it might seem like a good idea to simply reduce all your TTL’s to 10 minutes or so, but not only is this incredibly wasteful of internet resources it can cause performance issues for your web site possibly affecting sales and search engine rankings. Studies have shown that even small delays you would think barely susceptible to humans can make a difference when a user is making an opinion about your web site. In the event of an issue with your dns service, it also means your web site goes off-line faster. Some adsl routers struggle and even become unstable with sub 60 second TTL’s, so if your intended web site visitor is a home shopper, bear in mind if their router crashes when surfing your site, they are unlikely to buy!
Some dns records rarely if ever change. Mail servers and name servers are prime examples. It makes good sense to set these records at 24 hours or more. Some registries will even insist on it.
Below are some recommended minimum TTL’s for various record types. Set them longer if you can, but no so absurdly long that they take weeks to change if you do change them.
Record type Suggested minimum (in seconds)
A 3600, or 1 hour
MX 86400, or 1 day
NS 86400, or 1 day
CNAME 86400, or 1 day
Note, these are recommended minimums. If you can set your TTL longer, then do so. It will improve your sites performance globally for many users and reduce the load on worldwide dns infrastructure. As of 2009, the dns infrastructure of many ISP’s is overloaded. This has been mostly caused by the social networking phenomenon that has erupted over the last few years. Some organizations such as the department of defense have even blocked these sites completely to preserve resources. A single myspace page can have 100 or more dns lookups. Some larger ISP’s have reported 10% of the dns capacity taken by facebook alone. Many ISP’s have struggled to maintain high performance dns lookup service with this rapid increase in dns traffic. Setting your TTL’s longer will help avoid performance issues for users accessing your sites. Setting your TTL’s lower than 3 minutes for an ‘www’ record for example is pointless. Internet explorer will internally cache a dns lookup for 30 minutes, and Firefox for 3 minutes. These 2 browsers account for the vast majority of all web browsers. New visitors will of course get the new dns record quicker, but people surfing your site at the moment it changes will probably not.
Make use of the dns traffic graphs on CloudfloorDNS’s web site if you are using CloudfloorDNS’s dns services to see the affects of changing your TTL’s. If the traffic shows no real difference, then live with the benefits of a reduced TTL perhaps. If your dns traffic shows a dramatic reduction, seriously consider keeping the longer TTL to improve performance.
Preparing for a move.
What if one of your servers is moving or you have a change in supplier and need to change an IP address? The best way to go about this is to reduce the TTL on the records you want to change before the planned move. If your TTL is normally 24 hours, consider reducing it to 10 minutes a day before the move. This should mean that when you change your record it will be almost immediate. Once changed you can restore the TTL to the original setting. The below graph is a real-world example of a popular domain that changed the www record to 10 minutes rather than the usual 1 hour for an ip change. The change has a dramatic affect on dns traffic as you can see, so don’t forget to increase the TTL again later!
dns query usage graph. Light blue line at top is total number of queries per day
Not all ISP’s allow you this sort of granular dns access or reporting. CloudfloorDNS’s DNS service gives you full control over individual DNS records TTL’s and provides very detailed reporting on dns usage enabling you to performance tune your domains dns.
So that we can improve our search results, please let us know, did this help you? YES | NO
Please note that all articles are the property of Microtech Limited and must not be re-produced without express written permission
#5441
DNS time to Lives (or TTLs)
DNS Time to Live’s (or TTL’s)
Setting the TTL inappropriately for your domain can have significant side effects in terms of dns traffic and web site performance.
This document is intended to suggest reasonable TTL’s (time to live’s) and give some information on best practices for your domains.
Why is the TTL important?
The ‘time to live’ of a dns record specifies the amount of time other dns servers can cache your IP address before checking with us to see if it has changed again. DNS servers at users ISP’s generally provide a lookup service that is more local to the user, and hence generally faster to respond. The use of caching enables other users of the ISP that lookup the same record to retrieve the information directly from a very close source generally at a much greater speed. If there was no cache, every single time a web site URL was requested a dns query would need to be made to the servers that run dns for that domain. This can only take 20-50 milli seconds or so, but bear in mind a page may refer to a url lots of times on a page resulting in multiple dns lookups. On many sites as many as 20-30 times a page. Having a local cache prevents repeat lookups for information that is unlikely to have changed. If your TTL is set at 1 hour, the local ISP can cache that record locally and provide the information to other users from it’s local cache. Users PC’s also cache the information right on their own desktop meaning even faster access after that initial lookup.
The downside of a long ttl
The downside of having a TTL set at 24-48 hours as most larger ISP’s and web hosts do is that if you do have to make a change to your domains dns it can take up to the TTL to fully propagate around the world. This means that with your TTL set at 24 hours, some ISP’s could still be serving the old information 23 or so hours later. This is worst case, but you can see that it would be important to have both the old and new IP addresses both answering queries for the domain for some time to prevent some users being unable to access them.
The benefit’s or a short TTL
If your TTL is short it should be cached for a shorter duration by other internet systems. This means that should an IP address change as a result of a server move or network re-configuration, users pick up on that change and things start working again more quickly.
Finding a balance
The answer is to find a reasonable balance between lower TTL in case you need to make a change to your dns, and less dns traffic/better performance experienced with longer TTL’s. At first thought it might seem like a good idea to simply reduce all your TTL’s to 10 minutes or so, but not only is this incredibly wasteful of internet resources it can cause performance issues for your web site possibly affecting sales and search engine rankings. Studies have shown that even small delays you would think barely susceptible to humans can make a difference when a user is making an opinion about your web site. In the event of an issue with your dns service, it also means your web site goes off-line faster. Some adsl routers struggle and even become unstable with sub 60 second TTL’s, so if your intended web site visitor is a home shopper, bear in mind if their router crashes when surfing your site, they are unlikely to buy!
Some dns records rarely if ever change. Mail servers and name servers are prime examples. It makes good sense to set these records at 24 hours or more. Some registries will even insist on it.
Below are some recommended minimum TTL’s for various record types. Set them longer if you can, but no so absurdly long that they take weeks to change if you do change them.
Record type Suggested minimum (in seconds)
A 3600, or 1 hour
MX 86400, or 1 day
NS 86400, or 1 day
CNAME 86400, or 1 day
Note, these are recommended minimums. If you can set your TTL longer, then do so. It will improve your sites performance globally for many users and reduce the load on worldwide dns infrastructure. As of 2009, the dns infrastructure of many ISP’s is overloaded. This has been mostly caused by the social networking phenomenon that has erupted over the last few years. Some organizations such as the department of defense have even blocked these sites completely to preserve resources. A single myspace page can have 100 or more dns lookups. Some larger ISP’s have reported 10% of the dns capacity taken by myspace alone. Many ISP’s have struggled to maintain high performance dns lookup service with this rapid increase in dns traffic. Setting your TTL’s longer will help avoid performance issues for users accessing your sites. Setting your TTL’s lower than 3 minutes for an ‘www’ record for example is pointless. Internet explorer will internally cache a dns lookup for 30 minutes, and Firefox for 3 minutes. These 2 browsers account for the vast majority of all web browsers. New visitors will of course get the new dns record quicker, but people surfing your site at the moment it changes will probably not.
Make use of the dns traffic graphs on Microtech’s web site if you are using Microtech’s dns services to see the affects of changing your TTL’s. If the traffic shows no real difference, then live with the benefits of a reduced TTL perhaps. If your dns traffic shows a dramatic reduction, seriously consider keeping the longer TTL to improve performance.
Preparing for a move.
What if one of your servers is moving or you have a change in supplier and need to change an IP address? The best way to go about this is to reduce the TTL on the records you want to change before the planned move. If your TTL is normally 24 hours, consider reducing it to 10 minutes a day before the move. This should mean that when you change your record it will be almost immediate. Once changed you can restore the TTL to the original setting. The below graph is a real-world example of a popular domain that changed the www record to 10 minutes rather than the usual 1 hour for an ip change. The change has a dramatic affect on dns traffic as you can see, so don’t forget to increase the TTL again later!
dns query usage graph. Light blue line at top is total number of queries per day
Not all ISP’s allow you this sort of granular dns access or reporting. Microtech’s DNS service gives you full control over individual DNS records TTL’s and provides very detailed reporting on dns usage enabling you to performance tune your domains dns.
How do I configure Round Robin Load Balancing?
How do I configure Round Robin Load Balancing?
If your zone file contains more than one address record for the same A record name we will serve them up in a random order each time.
Round robin is used only if all the address records found have an aux value of zero. If any of the records have an aux value that is non-zero, load balancing will be used instead. Please see kb article ‘Load Balancing’ for more in depth information.
Configuring SPF records in your zone
Configuring SPF records in your zone
SPF stands for “Sender Policy Framework’ and is helpful in trying to prevent spam. The official SPF site can be found here at https://www.openspf.org/
CloudfloorDNS fully supports and recommends the use of SPF records where possible. All CloudfloorDNS DNS services support the TXT records required to implement SPF.
SPF records are simply TXT records added to your DNS zone file that list the mail servers that will be responsible for sending email for your domain. When another email server receives a mail claiming to be from someone@yourdomain.com, the remote mail server can check the SPF record, if it exists, and verifies that the mail server it came from is listed as a mail server that provides mail sending services for that domain. There’s no specific rules as to what to do if it doesn’t. Some servers will reject it, others tag it as possible spam etc.
Why is this useful? A great deal of spammers send out mail using other peoples domain names. This is not only inconvenient due to the flood of emails you will get, but it could quite possibly be damaging your business reputation etc. At the very least, it doesn’t look good. SPF helps prevent this happening.
If an email passes the SPF check, you will at least know that it originated from one of the servers listed in the SPF DNS records for that domain. This can also make it possible for ISP’s etc who run spam filters to skip at least some of the expensive spam processing.
How to transfer a gTLD domain from UKREG to CloudfloorDNS (guide)?
How to transfer a gTLD domain from UKREG to CloudfloorDNS (guide)?
Whilst the transfer process for gTLD’s is reasonably standard, we are preparing guides for specific ISP’s as each individual one often has it’s own quirks. We hope this guide makes the process easier for you.
To transfer a gTLD domain from UKREG to CloudfloorDNS, you need to do the following*
Login to UKREG’s website via the ‘members pages’ logo.
Select ‘Configure Domains, hosting, and web mail’
Click on the domain you want to transfer
Choose the option to ‘Unlock’ the domain for transfer
If the domain is a .info, .org, or other domain that requires an EPP transfer key, choose the option to ‘Video/Modify domain authorization code’, and make a careful note of the authorization code shown as you will need this when you request the transfer on our site.
If you require any assistance at any point, please do not hesitate to log a call via the support helpdesk
Do you support internationalized domain names?
Do you support internationalized domain names?
Yes, CloudfloorDNS supports internationalized DNS via their punycode ASCII equivalents.
The current worldwide DNS system supports ASCII characters only, this means that domains such as
職業.jp or 雇用.jp (if you hold your mouse over these links you may see the real url)
cannot be entered into or supported by the current dns system. To get around the ASCII limitation, these symbols are run through the ‘nameprep’ algorithm which translates the symbols to an ASCII equivalent. This ASCII equivalent, prefixed by the four character string ‘xn—‘ is used to create your zone file and is the name actually used for dns lookups. Entering the full ASCII string into browsers supporting IDN’s will result in the ASCII string being converted into the proper language symbols, and vice versa. IE7 has built in support for IDN’s, as does Firefox.
Internationalization of the TLD, for example, .中国 (.china in Chinese), is not supported by ICANN and thus is only available via domestic Chinese registrars.
How do I create SRV or server location records?
How do I create SRV or server location records?
Server location records, or SRV records specify the location of the server(s) for a specific protocol and domain. The `data’ column must contain three space-separated values. The first value is a number specifying the weight for this entry. The second field is a number specifying the port on the target host of this service. The last field is a name specifying the target host. The `aux’ column should contain the priority of this target host. Targets with a lower priority are preferred.
In the screenshot below you can see we’ve added a set of 4 SRV records for _collab-edge._tls
HOW TO ADD SRV:
We set the NAME to the SRV hostname in the far left column
Then we set the record type to SRV
In the DATA column we type in the WEIGHT of the record (10) then the PORT (8443) and then the HOSTNAME (collab-xxxxx.example.com.)
In the AUX column we set the PRIORITY (0 is the highest priority or the server that will be tried first)
The next column is the TTL (60)
The last column is for GEO DNS codes if you are using our GEO DNS SRV solution and have GEO DNS enabled

For more information, read RFC 2782.
https://www.ietf.org/rfc/rfc2782.txt
example: `0 9 server.example.com.’ (FQDN)
example: `0 9 server’ (hostname only)
How do I change the registrant name for a .UK domain?
Nominet does not allow you to change the registrants name for a .uk domain if it is a different person or legal entity without completing a ‘registrant transfer’.
If you have miss spelt the name and require it correcting we can log a request and they will investigate, but you must follow the above procedure if it is a name change or transfer to a different legal entity such as a company.
Please note that the transfer forms printed on the back of the old Nominet domain certificates are no longer accepted by Nominet.
This article applies to Nominet .UK names only.
Using DNS Failover
Using DNS Failover
DNS network fail over for CloudfloorDNS service using the Netmon services
The fail over feature provides a way for you to direct traffic to another host if the service on the primary host fails. You can fail over hosts in a DNS zone by setting up appropriate fail over tests on the Netmon service.
The video below will help you get setup for DNS Failover if your domain name is hosted on the cloudfloorDNS. We also have other methods that utilze CNAMEs if your primary DNS is with another DNS host.
Once you have configured a test using the netmon service :
In the ‘Domain name‘ box, put the name of the dns domain that the fail over relates to, i.e. mydomain.com. This must be the name of the domain that the records you want to fail over are in. This zone must be present on the Cloudfloor dns servers. The records you want to fail over must also exist in this zone.
In the ‘DNS records to fail over’ box put the records you want to fail over in the following way
recordname;Normal_ip_address;Failover_ip_address
For example
www;192.168.1.11;10.101.5.1
The above means that the ‘www’ record in the ‘mydomain.com’ zone will be set to ‘192.168.1.11’ under normal circumstances. Should a fail condition be detected, the ‘www’ record will be pointed to ‘10.101.5.1’. If the original server is detected back on line again, the ‘www’ record will revert to ‘192.168.1.11’. Make sure there is a carriage return after each line.
If you want to fail over more than one record, add them on subsequent lines, i.e.
www;192.168.1.11;10.101.5.1
smtp;192.168.1.11;10.101.5.1
pop;192.168.1.11;10.101.5.1
Notes
The URL or hostname you use to test with should not be once of the records that fails over. The reason for this is that once the test has failed, the hostname’s IP will change, and the test will be testing another host instead of the original. This will have the affect that the test will not fail back to the primary host. You should use an IP address or static hostname for the test host.
HTTP tests should not be to pages that redirect. The test is looking for a ‘good’ response, and a redirect etc will not be seen as such.
Fail over on HTTPS services can only be made using a URL that matches the SSL certificate as a valid test url.
Where are your name servers geographically located?
Where are your name servers geographically located?
Please see the Network Map, this shows all of the Network Locations including DNS and Monitoring locations
How to use CNAME records
How to use CNAME records
CNAME dns records are an important and very useful time saving dns type. CNAME records can be considered an alias.
For example. If you have 2 domain names mydomain.com and mydomain.co.uk and always want www.mydomain.co.uk to point to www.mydomain.com, you can CNAME www.mydomain.co.uk to www.mydomain.com. This way you only ever have to maintain the IP address of the www.mydomain.com record. If you change it, the www.mydomain.co.uk record will always change automatically.
A great use of this is where a single web site hosts multiple web sites. Each site is probably www.something.com. There are probably may sites pointing to the same server IP. Should this IP ever change it would be necessary to change all the ‘www’ records for all the domains. If you however CNAME the www records to one master domain, then you only have to change that master domain www record for all the others to change automatically. This is a fantastic time saver, especially if you don’t control the dns for some of those domains.
Advantages
Much easier to manage than specifying each A record in each domain individually.
Disadvantages
Causes 1 extra DNS lookup. One lookup needs to be made for the CNAME, then one for the A record it is CNAMED to. In reality this is probably only 150ms or so, but it could be an extra performance hit on very busy sites. Microtech DNS servers automatically get around this by looking up the A record internally as long as both domains are hosted on our servers and only serving the A record, thus saving the extra record and improving performance.
Tips
It can be worth setting the TTL on CNAME records slightly higher than other records as they are less likely to change. Even if the A record changes, the CNAME will still be pointing to the same place.
Cannot be used with MX records. Do not point an MX record to a CNAME.
Do not CNAME the host domain, i.e. CNAME is OK for host records such as ‘www’, but do not cname the actual domain itself. If you require your Root or Naked domain (also known as the Zone Apex) pointed to a CNAME, you can see use the ALIAS record type. See the KB article on using the ALIAS record
Automatically transfer existing DNS information
Automatically transfer existing DNS information
When enabling static DNS via the ‘enable dns for a domain’ option, or when transferring a domain name, you can choose the option to ‘Automatically transfer existing DNS information’. This helps move domains that are already have dns running elsewhere by attempting to transfer any existing dns information into a new zone file on our dns servers.
It is important to note that this may not be possible due to restrictions on the existing system, but our systems will take a ‘best guess’ in any case using publicly available information. This facility works in the following manner
We attempt to get a zone transfer from each of the current authoritative dns servers. This is the most effective and accurate way to transfer your zone. It enables us to see every record that has been configured and ensures the zone will be completely transferred. This option is sometimes not available due to zone transfer restrictions on other dns servers.
If option 1 fails, we poll all the common records that should be available for any publicly available domain name such as ‘www’, ‘smtp’, ‘pop’, etc, including the current MX records, and add them to your zone file. This option will not find any records that are not using common names, but it should save time and bring across any records that are ordinarily used for your website and email.
If neither of the above can be completed we will setup the zone with your default zone file
If you do not have a default zone file, a simple, minimal zone file will be created for this domain.
Can I bulk mass update DNS records?
Can I bulk mass update DNS records?
Yes. DNS records can be changed for entire groups of domains by selecting ‘Bulk Update’ from the DNS menu.
This facility also allows for the delayed update (i.e. scheduling) of the updates.
Using DNS Templates
Using DNS Templates
DNS templates are a powerful tool to managing multiple similar domains, especially in hosting situations.
Many domains are often pointed to the same servers and share common dns information. This is often the case if domains are for the same client, or are all being hosted on the same server.
CloudfloorDNS already has time saving features that enable you to set default zone files and create new zones based on zones that already exist, but templates go much further than that.
Imagine the following scenario. You have 250 domains hosted on your current web server. You decide to host elsewhere and the IP of the WWW record changes. What do you do? With template based DNS you simply update the master template and all the zones based on that template also update in real time. Adding, deleting, and changing records in the master zone affects all the domains based on the template.
You can build as many templates as you wish. This enables you to create templates for groups of domains, say those belonging to a particular client that have common settings. Next time the client asks for the ‘www’ record to be updated on all their records, or an MX record added to those 200 domains, it’ll be a 30 second job to update them.
To setup templates visit the management panel and click the ‘DNS Templates’ tab on the domain listing. Any existing templates will be listed, and from there you can enter the domain name you want to base the new template on (they must be based on an existing zone) and a description for that template. When you enable the dns facilities on a domain or create a new zone file you’ll be given the opportunity to create those zones based on any existing templates. The newly created zones will stay associated with that template and any changes made to the master zone will be replicated to all zones based on the master unless you ‘dissociate’ the zone from the template via the link on the dns editing for that domain.
Note that if you make changes to a zone file based on a template, and not to the master template, the changes will not be replicated elsewhere. This is intentional and allows you to still have domains based on template but retain the ability to add single extra unique records where required.
If you do not have templates in place but are looking to bulk insert, delete, or update dns records in multiple zones, please look at the ‘Bulk update’ feature on the ‘DNS’ menu.
How to use MX records
How to use MX records
MX records are essential for the correct delivery of email.
What happens when a mail server wants to deliver mail to your domain? This is a several step process. Firstly the remote mail server will ask for the dns servers for your name. If they cannot be found for whatever reason, the mail will in most cases be permanently bounced immediately. This is why it is so important to have a reliable set of DNS servers on a different network to your own. If you DNS is up, but your mail server is down, mail will most likely still come through later even if the sender gets a few delay messages in the meantime. Without dns, all your mail bounces.
The next step is to ask for a list of the mail servers who handle mail for your domain. These are the MX records. These each contain the following information
Domain name we accept mail for | host name of the mail server | preference value
If we have no MX records, some mail servers will then try the host domain, but we consider it essential that you add MX records if you want to ensure reliable mail delivery for your domain.
If the dns server has returned a list of mx records such as the following
cfdns.net | mail.cfdns.net | 10
cfdns.net | mail2.cfdns.net | 20
Then mail.cfdns.net is contacted first and the message is sent there. If no contact can be made with the mail.mtgsy.net, then mail2.mtgsy.net is tried, and so on. You can add as many MX records as you like in this manner. Note it is the lowest preference value that is used first.
What if you have a large amount of mail and want to load balance it between 2 or more servers? There are several ways to do this, but one is with MX records. On CloudfloorDNS servers, if you specify the same preference value for 2 or more MX servers then the connections should be more or less evenly distributed between the hosts.
Tips
In most cases, set the TTL record on your MX records higher than the default. If you normally set your dns record TTL’s to 3600 (1hour), set the MX’s to 1 day unless you are expecting to change them. MX records point to host names, not IP addresses so they are unlikely to change.
Never point an MX record to an IP address. You must always create and A record for the host name and IP address and then point the MX record to the host name.
Never point an MX record to a CNAME. Whilst this might work for some mail servers it will just confuse them and it’s not valid anyway. Don’t do it!
What is uptime?
What is uptime?
Here’s a little bit about ‘Uptime’. Firstly, in most cases, the uptime of single servers doesn’t necessarily mean much to reliability when you are talking about major networks such as mail or dns with multiple redundant sites.
So, is 99.9% better than 99%. Is someone really saying their server has 99.999% uptime? The actual downtime for each ‘9’ is listed below.
Uptime Corresponding downtime
98% 7.3 days
99% 3.7 days
99.9% 8 hours
99.99% 1 hour
99.999% 5 minutes
For any individual server, 99.999% is pretty unrealistic if you are maintaining it. Considering the reboot time alone is likely to exceed this, what about security patches etc that must be installed?
When we talk about the uptime of a ‘service’, this is completely different. CloudfloorDNS publishes live uptime figures for all critical servers on the status page here. Most the uptime figures are conservative as if the monitoring server get’s disconnected, even though the servers are up, the server counts some downtime as it cannot reach them. Still, most of our servers provide recorded uptime in excess of 99%. Does this mean we have 3.7 days downtime? No. Consider the dns network. There are a minimum of 4 sites. If a single site fails, dns resolution continues with almost no perceptible difference. DNS is a robust protocol and simply gets answers from the other servers. You could easily consider our dns uptime to be 100% based on these figures. The same follows for the mail servers. Simply because 1 server is down right now, the rest are still working, and the service, as a whole, is still running.
We can happily take down a dns server for maintenance. Yes, it will affect it’s individual uptime, but it will not affect the dns service as a whole. Multiple servers in redundant locations are far more important, and in most cases, considerably cheaper to provide than the much sought after 5 9’s uptime.
We hope this gives users something to thing about when considering uptime, especially as people sometimes consider it important in making service provider decisions.
How to transfer a .uk name from 123Reg to CloudfloorDNS (a basic guide)
How to transfer a .uk name from 123Reg to CloudfloorDNS (a basic guide)
Please note, that the 123Reg’s web site may change at any point in the future without our knowledge, this guide may become out of date, though we will do out best to keep it accurate. The following basic steps are needed
Login to the 123Reg control panel with your username and password as provided by them
Select your domain name from the drop down list and choose ‘modify domain’
Choose the option to change the IPS tag. Enter MICROTECH as the new IPS tag.
Once you have confirmation from us that the transfer is complete, you should update the name servers within 24 hours if you need to. 123Reg DNS, if you were using it will stop approximately 48 hours after you transfer away the domain. Failure to update your dns with us or another provider before then will mean your domain might stop working.
To setup dns on our web site for the name after it has transferred, click the name in the management panel. Choose the option to update the dns servers, click the button to set the name servers to CloudfloorDNS’s. Once you have done this, choose ‘enable dns for a domain’ from the dns menu and follow through the steps to setup dns for your domain. Please log a call via the support Helpdesk if you need any assistance.
Can I use .DK names with your name servers?
Can I use .DK names with your name servers?
Yes. 2 of CloudfloorDNS legacy name serves are currently .DK registered and approved for use with .DK names by DK-Hostmaster.
The name servers you should delegate your .DK domain names to are dns0.mtgsy.com and dns3.mtgsy.com.
Please let support know if you require any assistance or have any questions.
How to add a reverse DNS lookup zone?
How to add a reverse DNS lookup zone?
To create a reverse dns zone file on the CloudfloorDNS system, choose ‘Enable dns for a domain’ from the ‘DNS’ menu. Choose the static option.
On the following page, enter the name of the domain in the box. This will be different depending on the IP range you are adding, but as an example, 1.168.192.in-addr.arpa would be the name for 192.168.1.x. This assumes you have a class C subnet, i.e. 255 addresses. If you have a smaller subnet delegated to you, your name will be something like 16/192.168.1.in-addr.arpa, depending on the subnet you have been provided with. Note, you will have to have this subnet delegated to you, either via the IP registry such as ripe, or in the case of smaller subnet’s, by your ISP before reverse dns lookups will be resolved from this zone.
Once you have created the zone file, add your individual IP records. These can be added by adding a record type of ‘PTR’, setting the name column to the value of the IP address, i.e. 1, 4, 15, or 234, and setting the ‘data’ column to the name you want your IP to resolve to, i.e. ‘host192.mydomain.com.’. Make sure you remember the trailing dot (.) after the name if you list it in full.
How to detect unauthorized pages changes to websites?
How to detect unauthorized pages changes to websites?
The CloudfloorDNS Netmon monitoring service allows you to monitor on specific txt strings or CRC checksum for a specific webpage or server resource. If a page is changed the monitor will catch the change and notify you and/or failover the DNS record to a backup site.
How to monitor SMTP servers
How to monitor SMTP servers
To monitor SMTP servers simply add a test to Netmon with the test type ‘SMTP’. Make sure your port is set at 25, or set the the appropriate port number if you run your SMTP on a non-standard port. If you just do the above, then Netmon will alert you when the SMTP port is no longer alive. However, there are many occasions when the SMTP port is alive, but the service cannot respond correctly. For instance, the service may be alive, but the server run out of disk space or suffering another problem. In that type of situation the SMTP server will respond with an error code other than the ‘220’ everything is OK code. To check your SMTP status more thoroughly you can add ‘220’ to the ‘check response for’ field. This will ensure that your SMTP server is not only alive, but isn’t suffering some other issue that will prevent it accepting email.
What are Detagged domains?
What are Detagged domains?
Each .uk domain has a ‘tag’ associated with it. This lists the organization that is responsible for maintaining your domain name on the registrants behalf, or their agent.
If you domain name is ‘detagged’, it most likely means that at some point the tag holder that was responsible for the name has decided they no longer wanted to be associated with it and requested nominet remove it from their account.
Only the tag holder or nominet has permission to make changes to a domain name. This means that if you have a detagged domain name you want to move to CloudfloorDNS, you will need to ask Nominet (https://www.nominet.org.uk) to change the tag for you. They may make a small charge to do this. If there are any outstanding fees on the domain name, they may need confirmation from us first that we will accept any due fees. Make sure you have spoken to us first or requested a domain transfer via our web site so that we know to expect the domain.
keywords : detagged, nominet, tag
Do you have a DNS API?
Do you have a DNS API?
CloudfloorDNS has a full DNS API that allows you to create, delete, and manipulate dns zone files on our servers. You can also create and delete secondary or backup dns zone files on our servers in realtime to provide extra resilience to your own hosting services. The api enables you to easily integrate our dns services with your own web site or applications.
The DNS interface can be used with almost any programming language as is it based on HTTP calls. The API must be activated on your account before you will be able to use it. If you would like to make use of the API, please contact us in our Support Helpdesk with your requirements.
How do I resubmit a failed domain transfer?
How do I resubmit a failed domain transfer?
Sometimes a domain transfer will fail due to circumstances outside our / your control. Common reasons include
administrative contact does not respond to email epp / authorization key was incorrect
domain was not older than 90 days
domain was locked at the loosing registrar
various other reasons
If this happens and you take steps to resolve the issue you can simply resubmit the domain transfer without incurring any further charges by using the ‘resubmit failed transfer’ link that should be present next to the domain name in the domain management panel (domain names menu, ‘management panel’).
If you need to update, change, or supply an EPP or authorization key for the domain, click on the domain name in the management panel and choose the option to update the epp key.
If the administrative contact is not listed as you or someone you can get to authorize the transfer (you can check this in whois), then it can sometimes be easier to get the contact details updated to your own with the current registrar before re-initiating the transfer, or change the admin contact address to support@cloudfloordns.com and we will take steps to ensure the domain authorization is responded to appropriately.
Should you require any assistance, please contact support or use the live support on our web site where someone will be happy to offer advice and assistance.
You get warning errors on your dns editing page re mismatched name servers
You get a warning about mismatched name servers in the dns zone file editing page.
Warnings such as ‘dns1.XXX.net is present in the dns zone file by not in the public delegation’ and ‘dns1.XXX.net is present in the public delegation but not in the dns zone file’. These errors may or may not be critical. They can also show when the dns servers have recently been changed, but the dns information has not yet propagated around the internet (if this is the case, please check back 24 hours later and see if the error has cleared).
If you get this warning on a domain registered with CloudfloorDNS and you want the DNS to be pointing to CloudfloorDNS (so you can manage the dns from CloudfloorDNS ), there is a simple way to resolve this. Go to the domain management panel, click on the domain name in the management panel (it will be a link), choose the option to ‘update dns servers’. On this page there is a button near the bottom of the page that says ‘click this button to automatically set the name servers to CloudfloorDNS ‘s’. Click this button. This will update the domain name servers with the registry and also reset the NS records in your dns zone file with us, making sure they both match and that you are using the latest set of CloudfloorDNS ‘s dns servers. The error on the dns zone file editing page should go away within a few hours, though please allow up to 24 hours.
If your domain name is not registered with CloudfloorDNS , you will need to either update the name servers with your registrar to match the ones in your dns zone file with CloudfloorDNS , or update the NS records in the zone file to match the ones you have given to your registrar. CloudfloorDNS has several name servers (approximately 6), and some registrars only allow 2. Whilst this is not a good option from the registrar (it does not give you full fault tolerance). If you are getting the dns warning that the NS records in your zone file do not match the ones listed in the public delegation, this is most likely as we have by default listed all our name servers in your zone file, but your registrar is only listing 2 or 3. We recommend you change registrar, but if this is not possible or desirable, you will need to remove the extra ns records from your dns zone file.
Transferring domains away from 1&1 (1and1) to CloudfloorDNS (how to)
Transferring domains away from 1and1 / 1&1 to CloudfloorDNS
Start at https://contract.1and1.co.uk (or perhaps .com if you are not in the uk).
Chose the menu option to change your contract and select the contract from the list available
Choose the option to cancel individual items (or the whole contact if you are sure you don’t need anything else).
Select the domain option (as soon as possible) for the names you want to transfer.
Next page and do the next 10 if you have more than 10.
OK, to the confirmation page.
If you are transferring domains that require EPP keys, these should be presented on this page. Cut and paste them into something as you’ll need them when you enter the transfer request on CloudfloorDNS’s web site. They are case sensitive, so if you write them down, do it carefully.
Open the first link (right click and open in new window else you’ll loose the current one!). This will send an email to the contract holder asking for confirmation to cancel
Right click and open each of the other links, 1 by 1 and print them.
Sign and date the forms as needed and ‘fax back to the number on the form’ (note -despite 1and1 instructions, there appears to be no fax numbers on the forms we’ve seen, and it’s a different number than their main one. A call to their support verifies the fax number at the time of writing this is 0845 0762202)
.
To request the transfer in of the domains at CloudfloorDNS
Go to www.CloudfloorDNS.com, select ‘domain names’, ‘transfer’ from the menu and enter the names to transfer.
Don’t forget, if you have a number of domains to transfer and would rather we manage the move for you, contact our sales team
NOTE:: Please cancel your 1&1 hosting if you are no longer going to use it, else 1&1 will continue to bill you for hosting services.
keywords: domain, transfer, 1&1, 1and1, away, transfer guide
How do I add a sub domain to my DNS?
How do I add a sub domain to my DNS?
There are 2 ways to create dns subdomains on the Microtech platform. If you simply want a name for a website, then the easiest method is the first one. If you need completely seperate dns administration, for example if this is a branch office with different mail servers etc, then it is probably best for you to setup via method 2.
Method 1
Add a subdomain called subdomain.cloudfloordns.com to the cloudfloordns.com dns would be done as follows
Bring up the parent domains dns via the link on your management panel
In the new record section, type the name of your subdomain in the ‘name’ column, in this case, ‘subdomain’. No dot is required, nor should you put the name in full.
In the type column, select the record type (normally ‘A’ if pointing to an IP address), in the data field, enter the IP address or host name this sub domain points to, click the add button.
If you need to add MX records for this sub domain, add a new record with ‘subdomain’ as the name, MX as the record type, and put the name of the mail server in full (with the dot at the end) in the data column.
Method 2
This is generally preferred for more complex sub domains due to the fact management from the parent is separated.
Go to the ‘DNS’ menu, choose ‘Enable dns for a domain’, choose the static dns option.
Enter the name of the domain to setup, ie. subdomain.cloudfloordns.com
Proceed to the editing page and configure dns as normal.
If the parents dns is already on our servers, there is nothing further to do. If the parents dns points to servers elsewhere you will need to ask the dns administrator of the parent zone to delegate the dns for the sub domain to our servers.
Notes
If you create a sub domain using method 2, make sure there is no A record with this sam name in the parent domains dns as this will override your sub domain
If you already tried to see if your sub domain was working before you added it, it’s possible due to DNS caching at the client / ISP end it might not work right away. Please be patient and allow up to the zone TTL (normally 1 hour) for your ISP dns cache to clear.
keywords : sub domain subdomain sub-domain
Are wildcard DNS records supported?
Are wildcard DNS records supported?
CloudfloorDNS does fully support the use of DNS wildcards. To add a wildcard entry to your dns to make all otherwise no-resolving hosts resolve to a single IP address, add a single A record with the name set to an asterisk (*), set the type to A, and the data to the IP address you want all otherwise non resolved hosts to resolve to.
Note that you can still specify normal static A records such as WWW. Only hosts that do not already exist will match the wildcard record.
What is SSL?
What is SSL?
The SSL (and TLS) protocol is the Web standard for encrypting communications between users and SSL (secure sockets layer) e-commerce sites. Data sent via an SSL connection is protected by encryption, a mechanism that prevents eavesdropping and tampering with any transmitted data. SSL provides businesses and consumers with the confidence that private data sent to a Web site, such as credit card numbers, are kept confidential. Web server certificates (also known as secure server certificates or SSL certificates) are required to initialize an SSL session.
Customers know when they have an SSL session with a website when their browser displays the padlock and the address bar begins with a https rather than http. Newer browsers may also show the URL bar with a green background showing that the web site has undergone extended validation, your assurance that the company is legitimate. SSL certificates can be used on webservers for Internet security and mailservers such as imap, pop3 and smtp for mail collection and sending.
What is a Wildcard certificate?
What is a Wildcard certificate?
Unlike normal certificates that protect only a single named host such as ‘www.yourdomain.com’, or ‘secure.yourdomain.com’, a wildcard certificate can protect ‘*.yourdomain.com’. This means that the certificate can also be used for all the subdomains for a single domain. This is a great time and cost saver if you have multiple host names that need protecting.
Please check the compatibility of your applications before using a wildcard certificate. Whilst most modern browsers and devices do support wildcard certificates, there are a few applications, ISA server, Outlook Mobile access etc that in the past have not supported this well.
What is a single root SSL certificate?
When connecting to a website via a secuire connection the visitor’s browser decides whether or not to trust the SSL certificate based on which Certification Authority has issued it. To determine this, the browser looks at its list of trusted issuing authorities – represented by a collection of Trusted Root CA certificates added into the browser by the browser vendor (such as Microsoft and Netscape).
Most SSL certificates are issued by CAs who own and use their own Trusted Root CA certificates, such as those issued by GeoTrust and RapidSSL.com. As GeoTrust and RapidSSL.com is known to browser vendors as a trusted issuing authority, its Trusted Root CA certificate has already been added to all popular browsers, and hence is already trusted. These SSL certificates are known as “single root” SSL certificates. RapidSSL.com, a subsidiary of GeoTrust, owns the Equifax root used to issue its certificates.
Some Certification Authorities do not have a Trusted Root CA certificate present in browsers, or do not use the root they do own, and use a “chained root” in order for their SSL certificates to be trusted – essentially a CA with a Trusted Root CA certificate issues a “chained” certificate which “inherits” the browser recognition of the Trusted Root CA. These SSL certificates are known as “chained root” SSL certificates.
Installation of chained root certificates are more complex and some web servers and applications are not compatible with chained root certificates.
For a Certification Authority to have and use its own Trusted Root CA certificate already present in browsers is a clear sign that they are long-time, stable and credible organizations who have long term relationships with the browser vendors (such as Microsoft and Google) for the inclusion of their Trusted Root CA certificates. For this reason, such CAs are seen as being considerably more credible and stable than chained root certificate providers who do not have a direct relationship with the browser vendors, or do not use their own root certificates to issue SSL certificates.
Chained root certificates require additional effort to install as the webserver must also have the chained root installed. This is not necessary for single root certificates
How long will it take to get my SSL certificate?
How long will it take to get my SSL certificate?
It will take from 10 minutes to 10 days depending on the type of validation used. RapidSSL certificates are normally issued within a couple hours. Extended validation certificates will take much longer due to the extra checks which much be performed before the certificate is issued
How do I re-send the SSL approval email, or change it?
How do I re-send the SSL approval email, or change it?
If you did not receive the SSL approval email, or need to change it due to selecting a non-working address, this is possible.
Go to the SSL management panel. You will see the certificate ‘Processing’ or ‘Approval Email Sent’. Click the link to ‘Cancel Configuration’. This cancels the pending configuration and allows you to re-configure the certificate. When you click this link the management panel will re-load. The same certificate will be shown with the status ‘Rejected by customer’. Click the link to configure your certificate, and add the appropriate details again as per the first time configure. The authorization email will be sent to the new address.
For security reasons and to ensure that SSL certificates are only issued to relevant people, thus preventing fraud, the authorisation emails can only be sent to the addresses suggested by the drop down list. This normally consists of addresses at the domain itself, it’s parent domain, or the listed domain contacts in public whois.
How do I renew a certificate?
How do I renew a certificate?
Renewing a certificate is the same procedure as purchasing a new one.
As long as you use the same common name and type for the replacement certificate, GeoTrust will automatically add the relevant remaining portion of your subscription to the new certificate.
How do I change the domain name for an SSL certificate?
How do I change the domain name (common name) for a certificate?
For security reasons, the domain a certificate is issued to cannot be changed. Unfortunately, if you need to change the common name your certificate works with, you will need to purchase a new certificate for that name. If you only very recently purchased your certificate (7 days, maybe more), then it may be possible to cancel the order and receive a full refund against the purchase of another certificate. Please log a call with support with details including your certificate id if you wish to investigate this option.
I get the error The CSR uses a key that is believed to have been compromised!
I get the error The CSR uses a key that is believed to have been compromised!
GeoTrust certificates require a challenge passphrase be assign to the certificate. If you generated your certificate via WHM or other Linux based OS’s and didn’t specify a password, you will need to re-generate your CSR making sure you use a password.
I get the error unsupported extensions with pasting my CSR
I get the error unsupported extensions with pasting my CSR
GeoTrust certificates require a challenge passphrase be assign to the certificate. If you generated your certificate via WHM or other Linux based OS’s and didn’t specify a password, you will need to re-generate your CSR making sure you use a password.
What is a webzone and what are they used for?
What is a webzone and what are they used for?
A webzone is a credit CloudfloorDNS uses to provide you with certain services including DNS, email forwarding, network monitoring, DNS failover, and more.
Webzones are NOT required if you have an enterprise plan – enterprise DNS plans are setup to operate without webzones. .
The advantage of using ‘webzone’ credits instead of subscriptions to specific services is that the webzones are refunded when services are cancelled and so can be reused for other services. For instance, you have dns for 10 domains, costing 10 webzones. You remove 2 domains. You now have 2 webzones free to add a further 2 domains for dns.
Webzones work for all our dns services. You can redeem them for normal static dns, dynamic dns, and secondary dns. Because of the flexible nature of webzones you can switch between these different services at any time.
All webzone paid credits last for 1 year. Webzones can be purchased here and managed or renewed from here
To see how many webzones you are using, and where, go to the ‘my account’ menu and select, ‘my account’ menu option. This page shows you how many webzones you have and how many you are using. You can click the ‘where’ link to see exactly which services each webzone is being used for.
Transferring domains away from Fasthosts to CloudfloorDNS (how to)
Transferring domains away from Fasthosts to CloudfloorDNS
For non .uk domains
Start at https://www.ukreg.com
Click on the “Members Login” link at the top of the page.
Select “Configure Domains” in the middle of the page.
Log into your UKreg account.
Select the domain you wish to unlock.
Click “Unlock For Transfer” to see the screen in Fig. A. This does not apply to .eu domains.
Click “Confirm”.
Contact UKreg support and ask them to send you your Auth Code.
For .uk domains
Start at https://www.ukreg.com
To transfer a Fasthosts domain away from UKreg, you’ll first need to check if it was initially registered at UKreg or if it was transferred into UKreg from elsewhere.
Click on the “Members Login” link at the top of the page.
Go to UKreg and select “Configure Domains”.
Select the domain you’d like to move and choose “Change IPS Tag”.
The IPS tag for CloudfloorDNS is MICROTECH. enter it here.
If the domain was transferred into UKreg you must also send a fax, on headed notepaper, to UKreg providing the following information:
The new IPS tag name
The username and password for your UKreg account
The domain name
The support fax number for UKreg is 0870 888 3555.
To request the transfer in of the domains at CloudfloorDNS
Go to www.CloudfloorDNS.com, select ‘domain names’, ‘transfer’ from the menu and enter the names to transfer.
Don’t forget, if you have a number of domains to transfer and would rather we manage the move for you, contact our sales team
Transferring domains away from Godaddy to CloudfloorDNS (how to)
Transferring domains away from GoDaddy to CloudfloorDNS
Start at https://mya.godaddy.com
Click the ‘Manage domains’ link. This will open the domain control panel.
Click on the domain you want to transfer
Unlock the domain by clicking ‘change’ and choosing to ‘Unlock’ the domain.
To retrieve the auth code for the domain, click the ‘send by email’ link. This will email the auto code to the listed admin contact for the name.
To request the transfer in of the domains at CloudfloorDNS
Go to www.CloudfloorDNS.com, select ‘domain names’, ‘transfer’ from the menu and enter the names to transfer.
Don’t forget, if you have a number of domains to transfer and would rather we manage the move for you, contact our sales team
keywords: domain, transfer, godaddy, away, transfer guide
Transferring domains away from Joker to CloudfloorDNS (how to)
Transferring domains away from Joker to CloudfloorDNS
Start at https://www.joker.com
Login to Joker using the menu on the left and your Joker username and password.
Select ‘service zone’ from the menu
Click ‘advanced options’, then ‘ proceed’
In the ‘AUTH-ID’ section click proceed.
Enter the domain name into the ‘domain’ box and click the ‘send auth-id’ link.
The auth code will be send to the domain contact. if the contact data / email for the domain is out of date, update it before requesting the auth key by going to the ‘service zone’, then ‘domain modification’, then enter the name and update the admin contact.
If it is a non-uk domain, unlock the domain by clicking ‘service zone’, then ‘domain settings’, ‘proceed’, ‘domain modification’, ‘proceed’, and ‘remoew’ or ‘switch off’ domain protection.
To retrieve the auth code for the domain, click the ‘send by email’ link. This will email the auto code to the listed admin contact for the name.
To request the transfer in of the domains at CloudfloorDNS
Go to www.CloudfloorDNS.com, select ‘domain names’, ‘transfer’ from the menu and enter the names to transfer.
Don’t forget, if you have a number of domains to transfer and would rather we manage the move for you, contact our sales team
keywords: domain, transfer, joker, away, transfer guide
How do I change the name servers for my domain?
How do I change the name servers for my domain?
To change the name servers for a domain held with us, either click on the domain name in the management panel. On the next page, choose the ‘Update DNS servers’ link.
Add or remove name servers as needed (no need to click any ‘save’ button), or click the button to set the names servers to ours if you will be using our dns services. This function will also reset any NS records in your zone file as needed.
Name server changes will be requested by us within a couple minutes and confirmed by email. Due to DNS propagation around the internet, the change will most likely take several hours to take affect.
The procedure will be very similar for other registrars. Be aware that altering the NS records in your zone file/dns will not change the name servers for your domain. This must be done at the registry level. Some TLD’s will also check your DNS servers to ensure they are configured according to their particular preferences. .fr, .de, it, for instance. If your DNS is not configured properly, even though it may appear to be working, you can end up with your domain name suspended or even deleted. This does not apply to the major TLD’s such as .com, .net, .org, . uk, etc., but if you are using some of the very specific country TLD’s, please do check their requirements to ensure your re-delegation goes smoothly.
For some registries such as .com, name servers must be properly registered with the registrar of the host domain before they can be used. For example, if you want to use name server dns1.mydomain.com, the name server must have already been created by the registry that holds mydomain.com.This only applies if you are using your own or third party name servers.
If you are having problems updating your name servers, also check your contact information to ensure it is up to date. Registries may not allow domains to be updated if the contact information is not correct or domain ‘roles’ have been supplied instead of real persons names.
How often do your servers check my services?
How often do your servers check my services?
The netmon service can be configured to check your services as often as once per minute per test node. These tests are normally carried out by multiple independent servers, so this results in multiple tests per minute. Other standard intervals are 1, 3, 5, 10, 15, 20, 30, and 60 minutes. Bear in mind that between 5 and 10 of our monitoring servers will most likely be testing at these intervals. We also have a ‘Best effort’ test interval available. This tests constantly from each node, currently at 10 second intervals. This is for special circumstances only. We don’t recommend and most clients don’t need to run tests every few seconds. Cost of tests is affected by monitoring interval, which increases significantly under 3 minutes due to the additional resources required to carry out testing at those rates.
Advanced http redirects using the DNS editing page
Advanced http redirects using the DNS editing page
Whilst the management panel can provide ‘simple’ web forwarding, there are sometimes cases where more advanced web forwarding is required. Examples are forwarding a naked domain (just the domain name part without the ‘www.’) to your www.yourdomain.com for example. As simple as it sounds, this often causes issues.
CloudfloorDNS has implemented an advanced ‘redirect’ DNS type on the DNS editing page for your domain. Using the ‘redirect’ dns type you can create advanced forwards that automatically take care of the issues forwarding sub domains, naked domains, etc.
To create a redirect record, simply add a new DNS record using the ‘REDIRECT://’ record type. This is a special type of record that configure our web servers to forward your requests to another web site. In the data column put the full url you want to forward to, for example, https://www.mydomain.com. To forward the naked domain, leave the ‘name’ column empty. To forward a sub domain, put the name of the sub domain in the ‘name’ column, for example ‘support’.
You can see in the example below that there is a redirect on the naked domain, using a blank name and redirect to a https:// address. This takes any requests for example.com and instantly forwards them to the www.example.com url
CloudfloorDNS HTTP Redirect
There are different types of redirects such as 301, 302, hidden frame, etc. These different types of redirects can be implemented by specifying an ‘aux’ value for the record. In most cases, leave it as zero.
Aux value set to 2 = 301 redirect type, moved permanently.
![]()
We suggest you do not use this without good reason as a ‘permanent’ redirect is just that. It will be cached by search engines and users browsers directly and you may have no way to disable the forward at a later date as this data is stored locally on end users machines, not on our systems.
Aux value set to 1 = stealth forwarding – keeps your url in the browser url bar rather than showing the real url
![]()
Add 10 to the aux value to disable ‘explicit’ forwarding. Explicit forwarding is the default and will make www.yourdomain.com go to www.myotherodmain.com. It will also make www.youdomain.com/subdirectory go to www.myotherdomain.com. If you require that www.yourdomain.com/subdirectory go to www.myotherdomain.com/subdirectory, then do not use explicit forwarding.
keywords : http, redirect, forwarding, 301, 302, redirects, DNS Redirect, Redirect DNS Record
Performing Zone file backups
Performing Zone file backups
CloudfloorDNS users can make backups of their zone files at any time via the dns zone editing page. Just expand the ‘Previous Versions’ section and click the Add backup icon to create a new backup. Automatic backups of the entire zone are carried out every time you make changes to your zone file.
To view a zone file as it was when a backup was taken, expand the ‘Previous versions (backups)’ section, find the backup you wish to view and click the View previous version icon to view the backup. The historical copy will open in a new browser tab/window.
To restore a zone file to a previous version, click the Restore zone file icon. This will restore the zone as it was at the time the backup was taken. Backups are preserved for a certain period even after your zones are deleted, so accidental deletions and recoveries can be made using this feature.
Depending on your account, space for backups may be limited.
Enabling custom Netmon alerts to your clients
Enabling custom Netmon alerts to your clients
Netmon can notify your clients when their services are detected as failed. They can also be notified when the service is back up. This is a very pro-active way of letting your clients know you are already working on the issue. To enable this feature you need to configure a custom alert profile for your client. When configuring the profile, tick the ‘Email alert to client’ option. This will expand to allow you to design a html email which will be sent to your client when the monitored service changes status. The following is an example of a brief message that includes both up and down responses to the client.
“Dear Client,
$DOWNThere would appear to be a problem with some of your network services at the moment.
Please be advised that CloudfloorDNS engineers are already aware of the issue and are investigating.
$DOWN.$UP
We are pleased to inform you that the issue with your network has been resolved.
$UP.
Thank you.
XYZ Limited. ”
The text between the $DOWN and $UP will be removed as appropriate.
Multiple email addresses in the email address box can be separated by commas if you wish to alert several addresses to the issue.
How do I get my domains EPP or Auth code?
How do I get my domains EPP or Auth code?
To recover the EPP code to transfer a domain, click the domain name in the management panel as shown below.
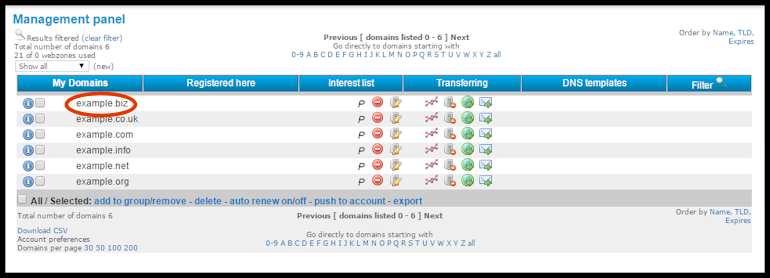
Once on the domain management page, click the option to ‘Get EPP key for this domain’ as shown in the screenshot below. This option will only show if this feature is applicable to this particular domain. Not all domains have EPP keys.
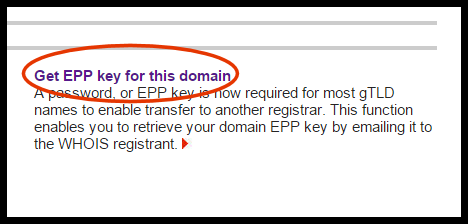
The key will either be shown on screen, or mailed to the registrant directly, depending on the registry policy.
Please do not ask us to supply epp keys via email or telephone etc. as we cannot do this for security reasons.
Importing your own self signed DNSSEC zones
Importing your own self signed DNSSEC zones
CloudFloorDNS offers simple to implement ‘one-click’ dnssec where we provide the necessary key management. If you prefer to sign your own zones locally and provide us with a pre-signed DNSSEC zone for distribution to our servers, please follow the following procedure.
Login to your account
Proceed to the DNS editing page for the domain you wish to sign.
Expand the ‘Zone file in bind format’ section towards the bottom of the page. From this section you can cut and paste or download your zone file in the common bind format that most signing tools will recognise.
Sign your zone locally .
Return to the dns editing page and expand the ‘DNSSec’ section.
Expand the ‘Advanced settings’ panel
Using the ‘Import self signed zone file :’ option shown below, browse to the file on your hard drive.
Click the link/button to ‘sign this zone’.
Note : Only the dnssec record types are imported. Other common records are ignored. It is essential that you sign the file you downloaded from CloudFloorDNS and not a similar file. Unless the file you upload contains records the same as the file you downloaded (exactly) the signatures will not match and dnssec verification will fail.
Incorrect configuration of dnssec can cause your domain name to fail. CloudFloorDNS takes no responsibility for the issues incorrect dnssec entries may cause, but we will endeavor to assist you in resolving any issues.
Geo DNS Geographical load balancing
Geographical load balancing / Geo DNS
CloudfloorDNS Geo DNS is a way of serving different responses to querying clients based on their apparent country of origin. Geo DNS on the CloudfloorDNS platform can be enabled for any domain during the DNS setup process by ticking the ‘Enable GeoDNS’ box. Use this method also for existing domains. It will not overwrite data unless you request that during setup.
To assign specific geo records, add them in the normal way as shown below. You will note there is a new ‘Geo’ column. Use this to add the appropriate 2 letter ISO country code you wish to apply to your record. You can specify multiple country codes separated by commas, for example, GB, DE, for Great Britain and Germany. Multiple records with different country codes and the same name can be added. Multiple A records with the same name and country code will server as a load balancing group for the specified country.
You can also update existing records to add the country codes to the if you wish.
For visitors from unknown or non-matching regions, the default record will be supplied. The default record is the record with the same name but no country codes listed.
Country code matching can currently be used with A records.
In the example below, you can see the Geo DNS is setup to use the WWW record. In this example you can see we have four different servers that handle the WWW traffic. You’ll see in the example that we have a WWW record without any GEO data – this “catches” the queries outside of the countries specified and sends them to the specific IP here. The other www records are set to serve to specific country codes – such as the top WWW entry serves the IP of 198.51.100.190 to Russia, Greece and Turkey only.
Office 365 DNS configuration
Office 365 DNS configuration
Configuring dns with use with Microsoft Office 365 is easy. Our support team receives a large number of enquiries how to configure Cloudfloordns with Office 365. This is a general guide to assist people in adding the correctly formatted Office 365 records to their dns.
Actual values and server names may vary as MS changes / expands it’s service.
You should verify these settings with their web site.
Mostly, questions are regarding the correct way to add the required SRV records.
The office 365 site will give you a list of settings similar to the following
For the SRV records, these will need to be added to your cloudfloordns panel in the following manner
Note that there is a . before the _tcp, _udp, or _tls.
Note that there is 1 space between each value in the data column. These values are priority, port, host name.
If the host name is external to the zone you are editing as per the above example, put a . (dot) after it.
Here is an example for the cname record
office 365 sip dns configuration
Some office 365 instruction pages tell you to add a @ to your name column. The @ is not used in Cloudfloordns (or many other dns systems). Instead of @, just leave the field empty.
keywords: office 365 dns srv sip office365
How do I add a subdomain to my domain?
How do I add a subdomain to my domain?
A subdomain is really just another host name. There are 2 ways to go about adding a new sub domain. If we have for example the popular example.com domain and we want to add the subdomain ‘accounts’, we have 2 ways to do this. The first way is to add a completely new domain from the dns services menu, setup dns, and call it accounts.example.com. This gives us a completely separate zone file for this subdomain. This is useful if you wish to delegate sub domains to others to manage, will have many records in the subdomain, or are required for security reasons to separate it.
The most common way people add simple subdomains if their only real requirement is perhaps to have it resolve and maybe different MX records is to add it directly to the parent domains zone file. Just add a new record with the ‘name’ column set to ‘accounts’ in this example, add the IP etc. and you are done. To apply MX records for this subdomain, add them as usual but put ‘accounts’ in the ‘name’ column. This makes the MX only apply to the sub domains.
Sub domains can be created on our platform even when we do not host the parent domain. To do this, create the subdomain as per the first example, then ask the maintainer of the parent domain to ‘delegate’ the sub domain to our dns servers. This is just a case of adding a few new NS records. This makes it possible for you to host sub domains of domains with Cloudfloordns without us hosting the parent domain.
CloudFloorDNS fully supports subdomains in all it’s dns products.
keywords : subdomain sub domain delegate
How to safely transfer your domain to another provider?
How to safely transfer your domain name to/from another provider
Having moved literally many thousands of domains names on behalf of clients over the last 20 years, here’s our recommended _safe_ way to move your domain name. Hopefully, if you follow these steps you won’t get caught out with your e-mail or web site going into limbo for a week whilst you wait for your name to transfer. Problems are rare, but best avoided!
The procedure is pretty much the same for all TLD’s, though for some like .uk the risks are far less as you are able to generally compete transfers in as little as just a few minutes.
Step 1, Is your dns held with the registrar or provided FOC with your domain name? If so, migrate your dns away to your new provider (us?), first. Get your DNS configured on your new provider and tested. At cloudfloordns we have a migration comparison tool that will check your new dns against your current live one and alert you of any differences. This is useful in checking you’ve got all your records correctly input. There are also import tools and you can cut and past the bind style zone file if you can get that data from your current provider. Once this is done and you are happy your dns is setup correctly, ask the current provider to change your DNS servers (re delegate your domain) to the new dns servers. Once this is done, pat yourself on the back. The worst part is over. Wait 48 hours. During this time, some requests will go to the old servers, some to the new servers. The exact time will depend on the TTL’s etc set by the previous provider, but a couple of days should cover it.
Step 2, unlock your domain (if applicable) at the current registrar. Check the contact data (whois). Make sure it’s up to date and that the e-mail addresses listed are ones you can receive or get someone else to respond via (this is used for most domains, but not .uk).
Step 3, Request your EPP or Authorisation code from the current registrar (this is used for most domains, but not .uk).
Step 4, Initiate your transfer with your new provider. They will ask you for the epp code if applicable
Step 5, depending on the TTL (not .uk), an authorisation e-mail is normally sent to the listed admin/owner contact asking them to authorise the transfer. If this is not responded to or one of the contacts rejects the authorisation, the transfer fails at this point.
Step 6, assuming you get this far, the new registrar will now be asking the current registrar for the domain name. Typically the other registrar has a set period of time to respond. This can take some time. Around a week for common names like .com, .net, .org. During this time, if the old registrar sends you an e-mail asking if you would like to approve the transfer, you can accept this and it may expedite the release of the domain to the new registrar. This functionality is also sometimes available on the registrars web site. Some registrars will however simply wait the maximum time then release the domain, so expect it to take around a week for the common .com etc. names.
Step 7, Congratulations – Hopefully you got this far and your new registrar has let you know the domain has moved. If they let you know otherwise, fix the problem and start again. If the domain transferred OK, now is a good time to make sure that the domain has all the correct contact details on it, verify you set the name to auto-renew, etc.
Note – For .uk domains, the procedure is much easier. Steps 2, 3, 5, and 6 generally don’t apply. You will simply be asked to change your IPS ‘TAG’ to something. Normally a name associated with the new provider if they are a Nominet registrar themselves (make sure you input this all UPPER case). Once the current registrar does this (which can be done in most cases via the old registrars web site), the transfer happens immediately. If it doesn’t, either the old registrar hasn’t done it yet (many say it’s done but queue it for later or manual update), or the new registrar hasn’t added it to your account yet. If you get a problem getting the old registrar to change the tag for you, they demand unreasonable fees to do so etc., as long as you are the proper legal owner of the domain name, you can go direct to Nominet and request they change the tag to the new provider for you, for a small admin fee.
Please let us know what you think of this guide and if we can improve it in any way.
How do I modify a .dk domain name?
How do I modify a .dk domain name?
.dk domains must be modified via .DK registrys own service at https://www.dk-hostmaster.dk/english/self-service/
If you do not have a login for the .dk website, you can request it from the same .dk web site. Instructions are on the login page.
How do I export my DNS zone file information?
How do I export my DNS zone file information?
If you need a copy of your dns information to pass to third parties, this is best achieved by exporting the zone file. Note – we do not advise you screenshot the dns editing page. The cloudfloordns platform provides some advanced functionality not replicable on traditional dns systems, so use the more compatible zone file export outlined below.
If you have the dns service enabled on any of your domains, go to the dns editing page. This can be done by clicking the icon in the domain management panel or by visiting the domain management panel and clicking the link to edit your dns (click domain in management panel)
Once the dns editing page loads, scroll down to the collapsed ‘Zone file in bind format’ section and click the bar to expand the section. Your zone file in plain text format is then shown. You can cut and paste the text or click the ‘download this zone file’ link to download the zone file as a text file.
SPF TXT records larger than 255 characters
SPF / TXT records larger than 255 characters
For some domains with complex email requirements, the SPF record can sometimes get too large to fit into a single record. There is typically a limit of 255 characters. As you can only have 1 SPF record per domain, what can you do? Well, mostly it is due to the inclusion of IP addresses. If you cannot consolidate multiple IP’s into ranges, i.e. 192.168.0.1 192.168.0.4 192.168.0.65 to 192.168.0.0/24, then there is a trick you can use to split your SPF into multiple records and still meet the single record per domain requirement.
Using the Alias Record - pointing a root or naked domain to a CNAME
Using the Alias Record – pointing a root or naked domain to a CNAME
Since CNAME records are increasingly popular and have limitations where you cannot CNAME to a Root or Naked domain (also known as the Zone Apex). CloudfloorDNS has an “Alias Record” that helps break the CNAME limitation so you can use it on a naked or root domain.
Cloud services such as Google, Amazon EC2 and Elastic Load Balancers (ELB) generally make it easy to integrate DNS, as most supply a CNAME record to which users point their DNS host names. However, CNAMEs come with many limitations. For example, users cannot normally point a naked domain or root record to a CNAME. Additionally, CNAMEs cannot be present with other record types of the same host name, so if users wish to use load-balancing features with groups of A Records and CNAMEs in this instance, they are unable to do so. These limitations not only add unnecessary complexity but also require valuable time to avoid.
CNAMEs are used as low maintenance DNS setups. If a service provider’s IP address changes, the settings would not have to change (as opposed to A Records, which would have to be changed to reflect the new IP). Additionally, ELBs often change their IP addresses in response to load. This can even be done without notice to the users, therefore making the CNAME the only reasonable solution for these technologies.
The “Alias Record” in our DNS allows users to add a CNAME to any record group and have it treated by the resolving client as an A Record, saving users time and money.
See an example of the Alias record in the screenshot below. This shows the Root or Naked Domain (Notice there is no name in the DNS record, this is the root zone) and it’s pointing to a server at Whatever.net called cloud-node-X-X-X-X-Whatever.net.
An example on how to use the ALIAS record at the root (blank name) record instead of a CNAME which will cause issues
The Alias Record gives the CNAME all the capabilities of the A Record, while improving overall DNS performance. This not only offers users much greater flexibility, but saves time and money as well. Preliminary testing has shown an average of 50 ms saved over typical connections by using the Alias Record, with top savings reaching the 250 ms mark. The Alias Record clones the CNAME record and once resolved, it can be served as part of a load balancing group with other A Records seamlessly.
keywords : zone apex, cname redirect, zone with cname, naked domain redirect, naked domain cname, zone apex naked domain, cname at the apex, forward naked domain
Using TCP Connect to monitor a server with Netmon
Using TCP Connect to monitor a server with Netmon
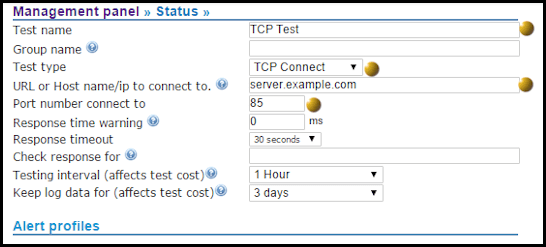 Netmon offers a variety of different testing protocols/methods you can use to determine a server failure. One such method is TCP Connect. The TCP Connect method will allow you to monitor a server using a TCP Connect method. This opens a TCP port on the selected host and if the TCP port allows a connect, the test is deemed successful. To setup a TCP test, you must first name the test, then select TCP Connect as the test type as shown in the screenshot shown below. You should then scroll down and input your server hostname and port.
Using UDP Connect to monitor a server with Netmon
Using UDP Connect to monitor a server with Netmon
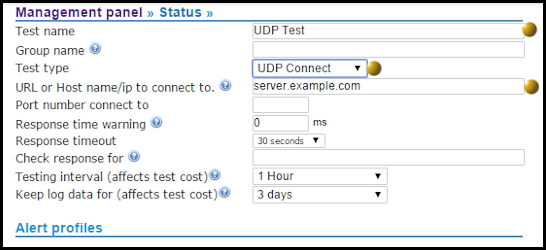 Netmon offers a variety of different testing protocols/methods you can use to determine a server failure. One such method is UDP Connect.
The UDP Connect method will allow you to monitor a server using a UDP Connect method. This opens a UDP port on the selected host and if the UDP port allows a connect, the test is deemed successful. To setup a UDP test, you must first name the test, then select UDP Connect as the test type as shown in the screenshot shown below. You should then scroll down and input your server hostname and port
Using PING method to monitor a server with Netmon
Using PING method to monitor a server with Netmon
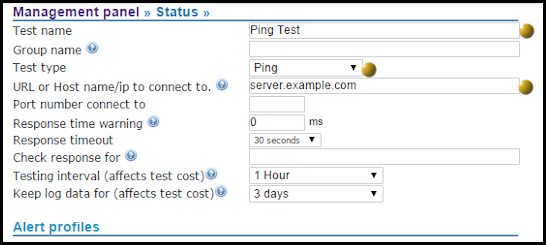 Netmon offers a variety of different testing protocols/methods you can use to determine a server failure. One such method is using PING. The PING method will allow you to monitor a server using a PING – using the ICMP protocol. This pings the selected host and if the ping responds the test is deemed successful. To setup a PING test, you must first name the test, then select PING as the test type as shown in the screenshot shown below. You should then scroll down and input your server hostname and save the test.
Using SSH method to monitor a server with Netmon
Using SSH method to monitor a server with Netmon
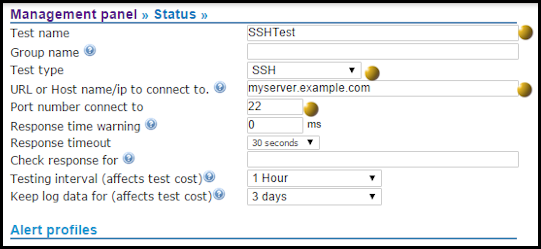 Netmon offers a variety of different testing protocols/methods you can use to determine a server failure. One such method is using SSH.
The SSH method will allow you to monitor a server using the SSH protocol on port 22. This connects to the host using SSH and if the SSH connection is made, the test is deemed successful. To setup a SSH test, you must first name the test, then select SSH as the test type as shown in the screenshot shown below. You should then scroll down and input your server hostname as well as the port (typically 22) and save the test
Using FTP method to monitor a server with Netmon
Using FTP method to monitor a server with Netmon
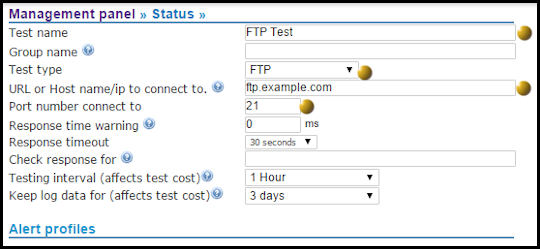 Netmon offers a variety of different testing protocols/methods you can use to determine a server failure. One such method is using FTP. The FTP method will allow you to monitor a server using the FTP protocol on port 21 – the typically port for FTP. This connects to the host using FTP and if the FTP connection is made, the test is deemed successful. To setup a FTP test, you must first name the test, then select FTP as the test type as shown in the screenshot shown below. You should then scroll down and input your server hostname as well as the port (typically 21) and save the test.
Using Telnet method to monitor a server with Netmon
Using Telnet method to monitor a server with Netmon
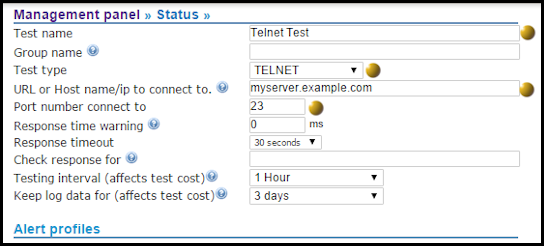 Netmon offers a variety of different testing protocols/methods you can use to determine a server failure. One such method is using TELNET.
The TELNET method will allow you to monitor a server using the TELNET protocol on port 23 – the typicaly port for TELNET. This connects to the host using TELNET and if the TELNET connection is made, the test is deemed successful. To setup a TELNET test, you must first name the test, then select TELNET as the test type as shown in the screenshot shown below. You should then scroll down and input your server hostname as well as the port (typically 23) and save the test.
Using DNS Experience test with Netmon
Using DNS Experience test with Netmon
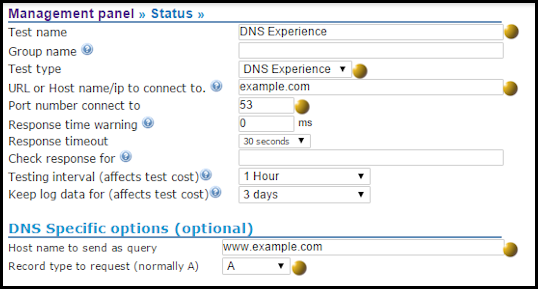 Netmon offers a variety of different testing protocols/methods you can use to determine a server failure, but it also offers a DNS experience test. This test method shows the real world DNS lookup experience and graphs the data for the duration you wish. The DNS Experience method will allow you to monitor a reponse time from a set of Authoritative DNS servers using a DNS lookup on port 53 – the typicaly port for DNS Queries. To setup a DNS Experience test, you must first name the test, then select DNS Experience as the test type as shown in the screenshot shown below. You should then scroll down and input your server hostname as well as the port (typically 53). You also need to scroll all the way to the bottom and input the record type as well as the subdomain you wish to query and save the test.
Using IMAP method to monitor a server with Netmon
Using IMAP method to monitor a server with Netmon
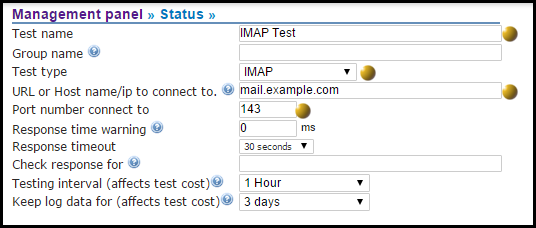 Netmon offers a variety of different testing protocols/methods you can use to determine a server failure. One such method is using IMAP.
The IMAP method will allow you to monitor a server using the IMAP protocol on port 143 – the typicaly non-secure port for IMAP. This connects to the host using IMAP and if the IMAP connection is made, the test is deemed successful. To setup a IMAP test, you must first name the test, then select IMAP as the test type as shown in the screenshot shown below. You should then scroll down and input your server hostname as well as the port (typically 143) and save the test
Using HTTP & HTTPS methods to monitor a server with Netmon
Using HTTP & HTTPS methods to monitor a server with Netmon
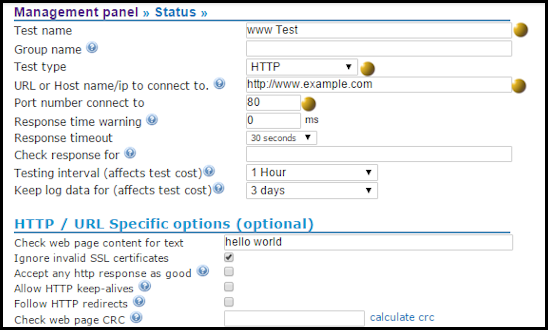 Netmon offers a variety of different testing protocols/methods you can use to determine a server failure. One such method is using HTTP/HTTPS.
The HTTP/HTTPS method will allow you to monitor a server using the HTTP/HTTPS protocol on port 80/443 or any other port for plain HTTP. This connects to the host using HTTP/S protocol and if the HTTP/S connection is made, the test is deemed successful. To setup an HTTP test, you must first name the test, then select HTTP/S as the test type as shown in the screenshot shown below. You should then scroll down and input your server hostname as well as the port and save the test.
How do I disable Whois Privacy?
How do I disable Whois Privacy?
Disabling whois privacy can be done under the domain in the Management panel. Click DOMAINS, MANAGE DOMAINS, FIND THE DOMAIN IN THE LIST, and then click on it. You’ll find the WHOIS privacy link as shown below in the bottom left of the domain options screen
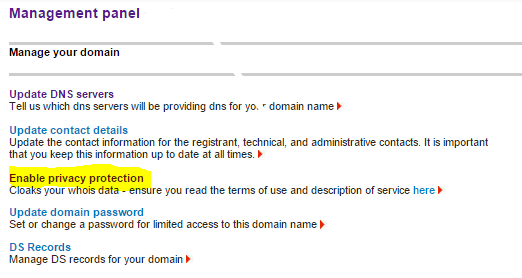
Domain Name Transfer Guide
General domain transfer guide
The following is a general guide in the safe transfer of domains between providers. Different procedures are used by the different registries in many cases, so the procedure varies depending on the domain type, .com, .uk, .eu, etc.
For all domains to be transferred in a safe manner, we recommend if you are changing your dns provider to us or elsewhere, do this first. Get your dns configured, change the name servers on the domain, wait 24 hours before initiating the domain transfer after verifying the name server change has taken place. Why? It’s been know for a few providers to discontinue their dns service on transfer, even though the transfer has not yet completed. This can leave your domain in limbo for a week or more, so for live domains, this is something to avoid. If you don’t care if the domain stops working, you can safely ignore this advice.
.com, .net, .org, and most other (especially US) domains. There are several steps when transferring these domains. Firstly, ask the current registrar to remove any ‘lock’ on the domain. 2, Ensure the whois contact information accurately reflects your ownership and has a working email address associated with the admin contact that you will be able to receive email to. 3, ask the provider to provide you with the ‘epp’ or ‘authorization’ code. Once you’ve done this, it’s time to request the transfer on our site. You’ll be asked for the domain name, then at the end, the epp code. What happens then is that your epp code is validated with the provider and assuming the domain name is unlocked, we check the whois records and send an email to the listed email contact asking them to confirm the transfer (don’t ask us to send the email elsewhere – we can’t – those are the rules). Once the email contact authorizes the transfer we ask the current registrar to provide us with the domain name. At this stage, as long as they don’t object, it’s generally just a matter of us waiting for them to provide us the name. This can take 7 days. Note, a few registrars allow you to pro actively approve the move either via their control panel or by you acknowledging an email. In these cases the transfer can be made to happen sooner.
For .uk domains, the process is fast, free (in most cases), and simple. To transfer a .uk domain simply request the transfer via our web site. You will receive an email with further instructions. All you need to do then is go to the current domain registrar and ask them to change the ‘IPS TAG’ as per the email we send you. As soon as they do this, the transfer is complete. This means that as long as the other side makes the change when you request it, you can move .uk domains between providers in minutes. Our own tag change is done in real-time. Not all providers can do this, so allow some time for them to make the change their end.
tips
If a registrar tries to impose an ‘admin’ charge for leaving, you can in fact bypass them and transfer out via ‘nominet’ directly. This is also a good route if you no longer have access to the management panel, original provider, etc. As long as you are the correct legal owner of the name and can demonstrate that, nominet will normally allow you to move the domain via them for a small fee.
Notes: Some registries do not allow the transfer of domains less than 60 days old.
Transferring Away from CloudfloorDNS to another Registrar
Transferring Away from CloudfloorDNS to another Registrar
To transfer a .uk domain away from CloudfloorDNS , please see the transfers section of our web site. Transferring a UK domain away is immediate. If you are transferring another type of domain, your new registrar will handle the procedures for you and you should contact them for details of their procedure. All you need to do here is ensure your domain is not locked. There is no need to contact us.
Most domains cannot be transferred until they are more than 60 days old. Domains cannot be transferred if there is an outstanding balance owed on them or if they are locked. You can check the domain lock on your domains by clicking on the name in the management panel.
If you are transferring a .uk domain away from CloudfloorDNS to another TAG holder, there is no charge providing you use the free and automated routines on our website. If you require us to make the changes manually for you there is a $50 charge to cover the extra time and security checks involved.
How can I forward the same email to more than one person?
How can I forward the same email to more than one person?
To create a forward that can forward the same email to up to 3 separate addresses, add the forward to addresses separated by commas, for example recipient1@mydomain.com,recipient2@mydomain.com,recipient3@anotherdomain.com You can specify up to 3 addresses in this way. Don’t use spaces. When the email arrives at one of our servers, it will be forwarded to all (maximum 3) recipients.
What MX Records do I have to have set to use the Email Forwarding?
What MX Records do I have to have set to use the Email Forwarding?
In order for mail to arrive at our mail servers, you need to have the MX records for your domains dns set to the following, in order of preference
Mail.mtgsy.net
Mail2.mtgsy.net
Mail3.mtgsy.com
You will most likely have to set a preference value, or ‘aux’ value, we suggest mail be 10, mail2 20, mail3 30.
Please ensure you set them accurately as listed above.
If your dns is hosted here the system will automatically make the above changes for you where possible.
If you dns is hosted elsewhere, please contact however manages your dns to have these changes made. If you need assistance, please log a call via the support helpdesk.
Using Dynamic DNS on Windows
CloudfloorDNS offers Dynamic DNS, the ability to automatically update a zone file with the current dynamically assigned IP address. There are a few steps you need to get Dynamic DNS working on CloudfloorDNS when using the Windows platform:
1) Create your Dynamic hostname – click DNS, Setup DNS, Dynamic DNS and enter in your hostname.
2) Once your hostname is created, you need to update the IP address to your server’s IP – download the DirectUpdate DDNS Client for Windows
3) Install and Run DirectUpdate Administration Module to configure your CloudfloorDNS DDNS account. Click ADD to add an account
4) You’ll now see a screen similar to the screenshot shown below (click to enlarge)
You first enter in the domain name you want to update as the name, the click ON use secure protocol checkbox as shown
You then need to enter in your CloudfloorDNS username and password on the account, this will use those credentials to login and update any Dynamic Domain you have on your account. Lastly, you need to pull down the Account Type (upper right corner) and scroll down and select MICROTECH from the list. This is the original name of CloudfloorDNS DDNS service. That’s it. The DirectUpdate application will now update your IP address on that hostname.
Using CAA records for Certificate Authority Authorization
CAA Records are a newer type of DNS resource record type for name-value pairs that can carry a wide range of information to be used as part of the CA authorization process. It may also be possible for certificate evaluators to use CAA records to detect possible mis-issued certificates. However, the certificate evaluator should consider that the CAA records may have changed between the time the certificate was issued and the time the certificate is observed by the evaluator. For more information on CAA records please read https://tools.ietf.org/html/rfc6844 RFC 6844
An example of the CAA Record on the CloudfloorDNS platform. When entering a CAA record type you should create the record based on the type of certificate you are obtaining. Here we are obtaining a SSL Certificate for vpn.example.net using GEOTRUST as our CA. Supplement the CA domain provider of your choice and relace the GEOTRUST domain name with your CA’s domain
For more information on CAA records and using them with GEOTrust and RapidSSL see the respective FAQ’s on their sites:
https://www.rapidssl.com/support/
https://www.geotrust.com/support/
To obtain a certificate at the root level you would keep name blank and add the record to your zone

GDPR FAQ & Information
What is GDPR?
The General Data Protection Regulation (GDPR) is a European Union law focused on data protection and privacy for all citizens and residents of the EU. The GDPR policy regulates how organizations such as CloudFloorDNS can process personal data about individuals residing within the EU. GDPR goes into effect on May 25, 2018. For a more detailed description of what GDPR is and how CloudFloorDNS is GDPR compliant, please review What is GDPR?
Who does this impact?
This impacts how CloudFloorDNS handles data for customers residing within the EU. Please see our updated Privacy Pl
Where is my data stored?
Your personal data and all archived data is stored within the EU at all times
Our Updated Privacy Policy
View our Privacy Policy
Our Updated Terms of Service
View our Terms of Service
Using DMARC records in DNS
Although there are other options in DMARC that are not mentioned here, these are the most common options for forming your DMARC txt record in DNSAlthough there are other options in DMARC that are not mentioned here, these are the most common options for forming your DMARC txt record in DNS
Here’s how you add a DMARC text record for your domain in the CloudFloorDNS control panel:
NAME TYPE DATA
_dmarc TXT “v=DMARC1; p=none; pct=100; p=quarantine; rua=mailto:domains@YourDomain.com;”

Domain is the domain you want to protect. By default, the record protects mail from the domain and all subdomains. For example, if you specify _dmarc.YourDomain.com, then DMARC protects mail from the domain and all subdomains, such as testing.YourDomain.com or development.YourDomain.com
TTL should always be the equivalent of one hour (3600 seconds)
pct=100 indicates that this rule should be used for 100% of email.
Policy specifies what policy you want the receiving server to follow if DMARC fails. You can set the policy to none, quarantine, or reject.
Restoring DNS or a Deleted Domain Name in the control panel
If you have accidentally deleted DNS service or deleted a domain or a domain name has gone missing from your control panel, you can restore the domain from a backup.
In order to restore a domain name back into your panel, you should perform the following steps one you have logged into the CloudFloorDNS Control Panel:
- Click Manage DNS, Setup DNS, and then select Static Cloud/Web DNS
- Enter the domain name you wish to restore in the upper left as shown in the screenshot beow
- Select Restore from backup if available
- Agree to the Terms of Service and Acceptable Use Policies and click Continue
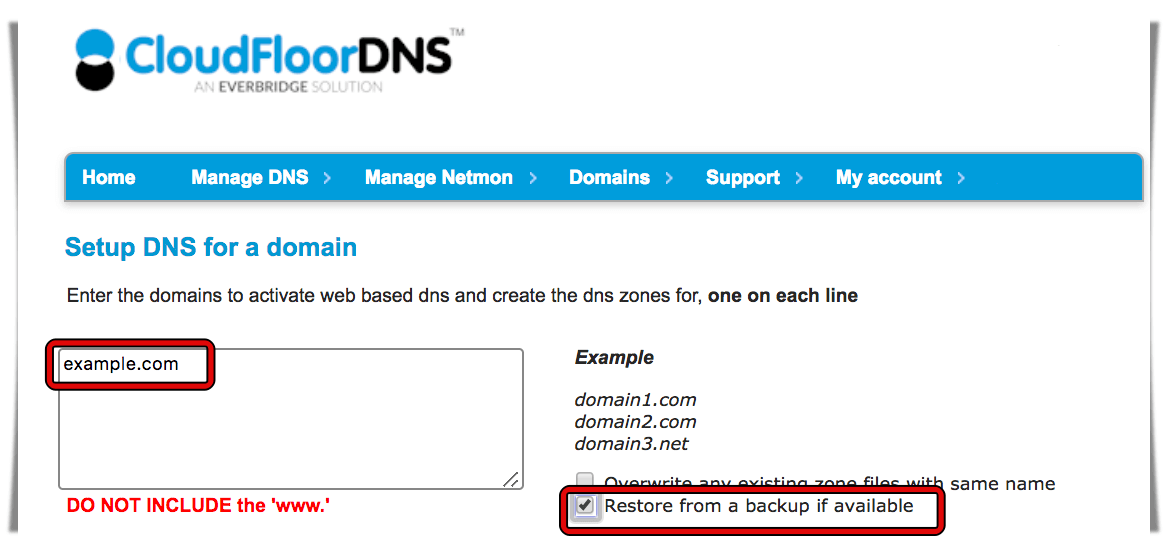
Moving your DNS to a new provider
Are you moving your DNS to a new provider? CloudFloorDNS can help you move your DNS away from Dyn, GoDaddy, Reg123, Network Solutions and other DNS providers when moving to our Enterprise Anycast DNS platform. You can get some basic steps in our howto blog post titled “Moving your DNS to a new Provider” and of course you can contact us to help you setup a new account
My domain is being appended to an entry I just added to DNS
Are you seeing your domain name appended to the end of a record you just added when testing? If so, this is a common error and you need to add a DOT (.) to the end of the hostname in the data field (CNAME or MX). Use the DNS editor to add the dot and then save the record. Once the TTL cache expires, you can then try again and your hostname will resolve properly
How long does it take to Transfer in a domain?
When transferring in a domain, it all depends on what type of domain or TLD (.com, .net, co.uk)
.COM, .NET and .ORG and other popular domains typically will take up to 7-10 days to transfer fully. There is a waiting period that is mandatory by ICANN and in now way or form can this be sped up to transfer sooner. For NOMINET domains like .CO.UK you can transfer immediately by purchasing the transfer from CloudFloorDNS and then changing the IPS TAG to MICROTECH. This will transfer the domain in immediately
How do I add or update my EPP Auth code for a domain transfer?
If you forgot to enter your EPP auth code or need to update it for a pending domain transfer, you can You can enter or update an EPP Auth code for a domain by clicking on the domain name in the list (DNS, Manage DNS or Domains, Manage domains)

Once you click on the domain, you will see the transfer options section in the bottom of the domain page. Click UPDATE EPP as shown below and you will then be able to enter or update the EPP Auth code

Migrating your Domain from Anycast Zone1 to Zone2
The CloudFloorDNS Enterprise Anycast DNS platform has two options for hosting your DNS zones – Zone1 and Zone2. Zone2 offers the latest and greatest DNSSEC, Secondary DNS and other options, but does not support some of our legacy features such as country based GEO DNS, etc
In some cases, CloudFloorDNS may provide the option for you to move to Zone2 or if you have technical requirements that are better suited for Zone2 Anycast, you can easily migrate between the ANycast DNS Zone1 and Zone2
Migrating is as easy as selecting the domain in the management list, then in the lower left TRANSFER OPTIONS area, you will see MIGRATE PRIMARY ZONE. Click this and step 2 will provide the options, click the option Migrate Zone1 to Zone2 and click the I agree and then the big blue button to continue. This will then put in a job to migrate and will email you when the process is done.
