
Secondary DNS Setup – Using Dyn Managed DNS as Primary & CloudfloorDNS as Secondary
Technical How-To on replicating your zones at Dyn to CloudfloorDNS
![]()
[Download as PDF]
It’s easy to add reliability to your DNS by using CloudfloorDNS as a backup or secondary DNS provider to your Dyn Managed DNS account. Follow this tech doc on how to enable Secondary DNS at Dyn and start using CloudfloorDNS as a backup DNS. This document shows you how to setup backup DNS for only one Zone, if you have multiple zones you can review this Dyn document here: https://help.dyn.com/using-external-nameservers/
PREREQUISITE – BEFORE YOU BEGIN: You must have a Dyn Lite or Enterprise Managed DNS account to enable secondary DNS.
Setup Permissions for Zone Transfers from Dyn
1. To enable Secondary DNS , Login to Dynect and click on MANAGE DNS.
![]()
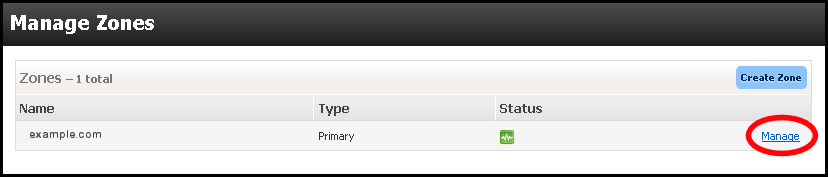
2. Click on the MANAGE link on the domain name you want to setup Secondary DNS on as shown below

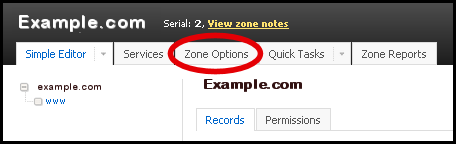
3. Select Zone Options tab as shown circled.
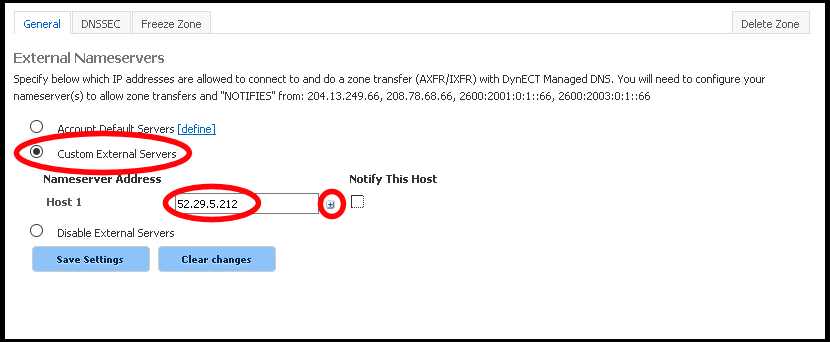
4. You’ll then see an option to add Server IP’s that can perform AXFR Zone transfers. Click CUSTOM EXTERNAL SERVERS as shown. You should then add in these four IP’s from CloudfloorDNS. Once you add in the first one, you need to click the + sign that is circled below to add the other 3 IP’s. The IP’s are: 52.29.5.212 , 93.189.165.200 , 109.73.72.163 , 109.73.72.164
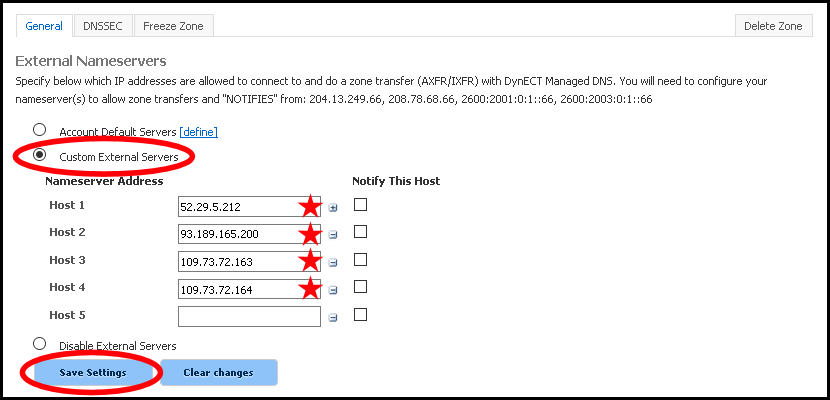
5. Once you are done, your screen should look exactly like below. Click Save Settings once you are done.
That’s it on the Dyn side for now, we’ll come back to Dyn in the last few steps to add CloudfloorDNS to the delegation. Now we need to login to our CloudfloorDNS account at https://Panel.CloudfloorDNS.com
Add Secondary DNS on your CloudfloorDNS account
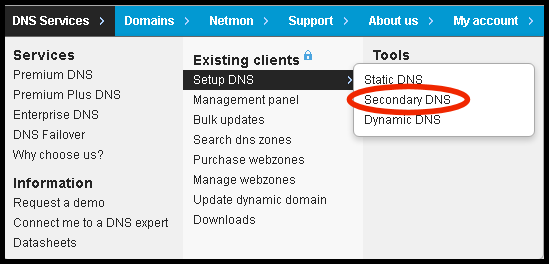
1. Login to CloudfloorDNS and select DNS SERVICES, SETUP DNS, SECONDARY DNS as shown in the screenshot below:
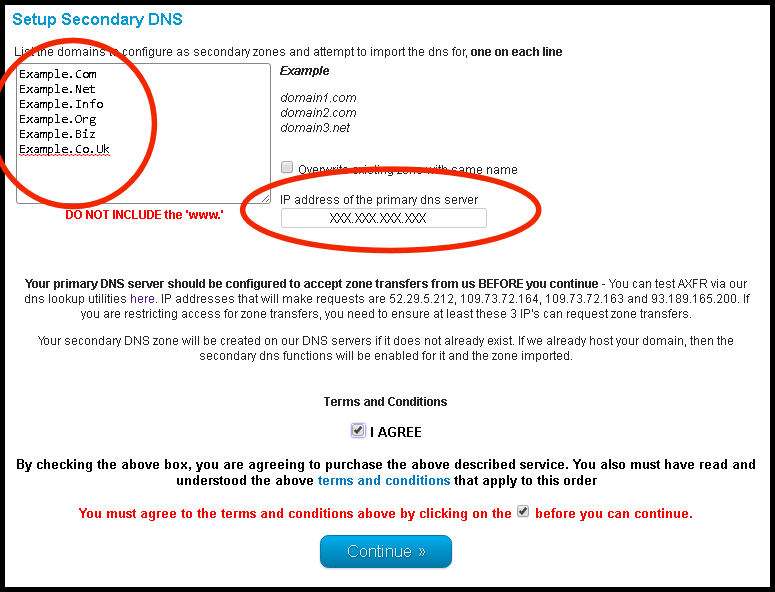
2. You now add your Domain name that you’ll be using to setup Secondary DNS. Add them to the list as shown below. Enter domains – one per line, or a single domain. You also need to enter the IP Address from Dyn where you’ll be pulling zone information from. Dyn has two servers for AXFR transfers, they are:
Dyn Primary AXFR Server is 208.78.68.66 and the alternate server is 204.13.249.66
Be sure you have the latest AXFR server IP’s from Dyn, see this article: https://help.dyn.com/using-external-nameservers/
Enter the Dyn AXFR PRIMARY DNS SERVER as shown below. We used 208.78.68.66
Agree to the Terms of Service and then click continue.
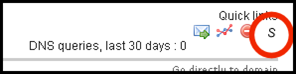
3. You’ve now added the secondary zone and it’s ready to be replicated. Replication will take place every 60 minutes automatically. If you wish to propagate these changes sooner, you can pull the changes manually using an API call or the management interface. Login to the CloudfloorDNS platform and click on the domain name you are forcing zone replication on. Now that you are on the domain details page, look in the far upper right corner for the “quick links” area – Click on the Secondary DNS “S” icon as shown circled in the screenshot below:
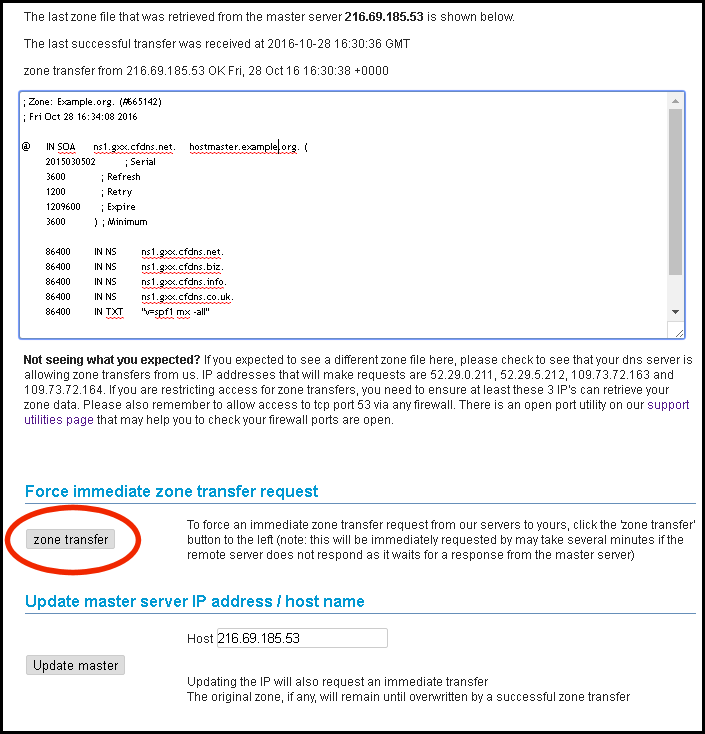
4. Now you’ll be in the Secondary DNS options for your domain. You’ll see the zone data below and the status on the last zone transfer. To force an immediate XFR of the zone records, click the ZONE TRANSFER button as shown circled in the screenshot shown below. You can also force a zone replication using the API. Please contact your account manager about using the API for secondary replication.
5. The last step in the process is to add CloudfloorDNS Anycast Name Servers into your public delegation for your domain. Login to Dyn, and click manage DNS as shown below:
![]()
6. Click on the MANAGE link on the domain name you want to setup Secondary DNS on as shown below
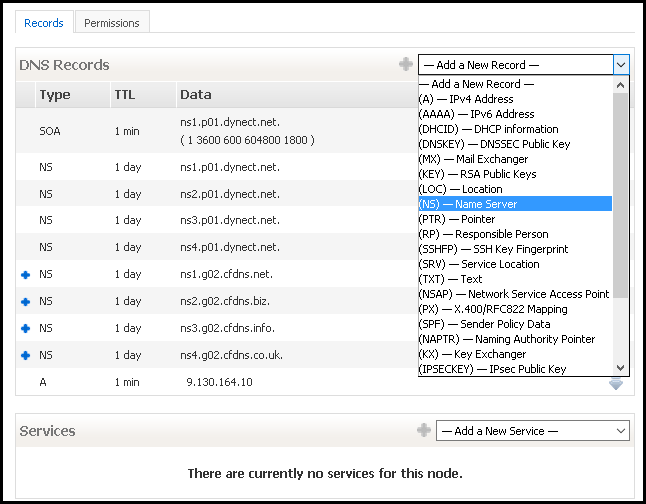
7. You’ll now see the Zone Editor and will see your DNS records for the domain name you are adding Secondary DNS onto. Click ADD NEW Record on the right side and select (NS) – Name Server from the list.
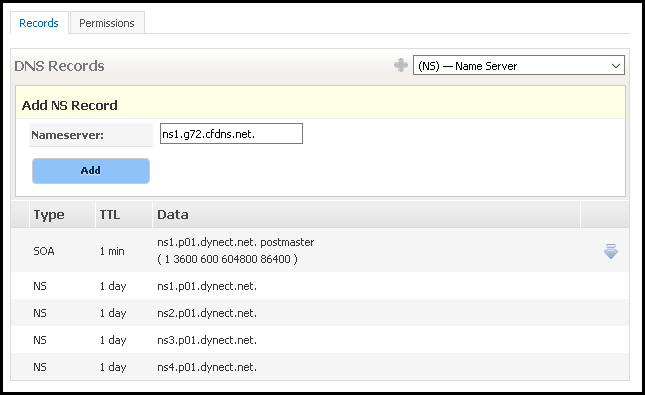
8. You’ll now see the option to add a nameserver to the zone. Enter in the CloudfloorDNS name servers you were assigned. In this case, we are assigned to pool 72, using the following nameservers:
ns1.g72.cfdns.net
ns2.g72.cfdns.biz
ns3.g72.cfdns.info
ns4.g72.cfdns.co.uk
Enter in the first nameserver as shown below and click the Add button. We need to add the four servers above to the zone. Do this for each of the nameservers listed above. This means we will have to do this four times. Please note your name servers may be different since CloudfloorDNS uses DNS pools for optimum performance. If you have questions about what nameservers to use in your delegation, please check with your Account manager or CloudfloorDNS support before continuing.
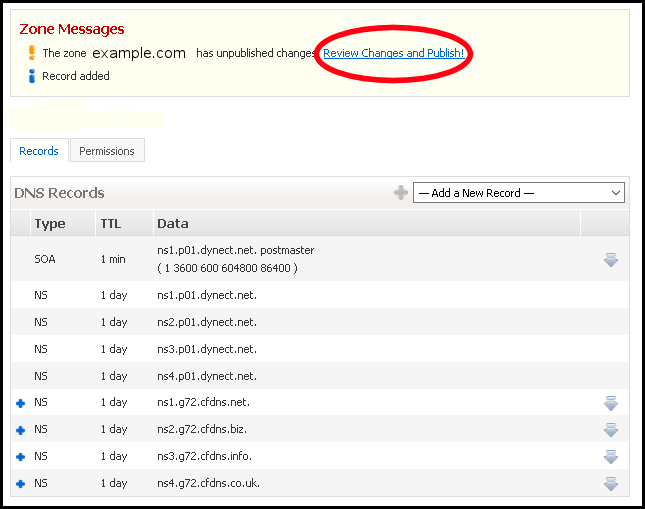
9. You should now see the name servers you added look similar to the screenshot below. Keep in mind your name server assignments may be different from the example below. Double check your entries and make any necessary changes. Once you are done, click REVIEW CHANGES and PUBLISH as shown circled below
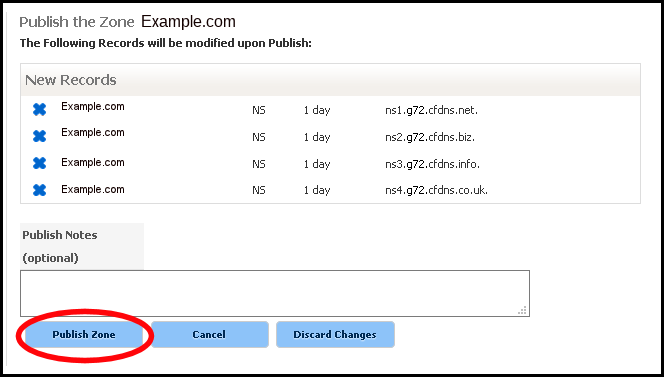
10. You’ll now be shown the changes you added to the zonefile. Review the changes and be sure that everything is spelled correct and then click Publish Zone.
11. You should now login to CloudfloorDNS perform a manual zone replication to ensure that everything is in sync. Although replication will take place every 60 minutes automatically, you should pull these changes up and do this forced replication when you make any changes to the master zonefile at Dyn.
To activate the AXFR command on the zone, login to CloudfloorDNS and then select Domains from the menu and then select Manage Domains. Click on the domain name you are forcing zone replication on. Now that you are on the domain details page, look in the far upper right corner for the “quick links” area – Click on the Secondary DNS “S” icon as shown circled in the screenshot below:
12. Now you’ll be in the Secondary DNS options for your domain. You’ll see the zone data below and the status on the last zone transfer. To force an immediate XFR of the zone records, click the ZONE TRANSFER button as shown circled in the screenshot shown below. You can also force a zone replication using the API. Please contact your account manager about using the API for secondary replication. CloudfloorDNS will now backup your DNS zones using AXFR zone transfers every hour.
13. Adding CloudfloorDNS Name Servers to your Delegation allows the CFDNS servers to start answering for your domain. This final step is done at your domain name registrar (GoDaddy, Network Solutions, etc)
This process adds CloudfloorDNS Anycast Name Servers into your public delegation for your domain. This is typically done at the registrar where you hold the domain name. This could be GoDaddy, Network Solutions, etc. Login to your domain registrar, and add in the following Name Server records into the “Set Name Servers for your domain” area under DNS. Add in the custom list of CloudfloorDNS name servers alongside your DNS Servers you have list for Dyn. The list below is similar but not what you should use. When you sign up for Secondary DNS Cloudfloor will assign you a custom list of nameservers for your account.
ns3.g72.cfdns.info
ns1.g72.cfdns.net
ns2.g72.cfdns.biz
ns4.g72.cfdns.co.uk
Save these settings, your Secondary DNS will now start working and answering along with your primary DNS. You will see queries drop at your main location and CloudfloorDNS will start to balance out the DNS Queries. You can check your stats and replication status under the Domain Management panel at any time.